Table of contents
Get OpenClaw Running
In this chapter you'll learn the environment requirements for OpenClaw, the actual install procedure, and the recommended choices in the onboarding wizard.
Environment Requirements
OpenClaw requires Node.js 22 or above.
Node.js install option 1: GUI installer.
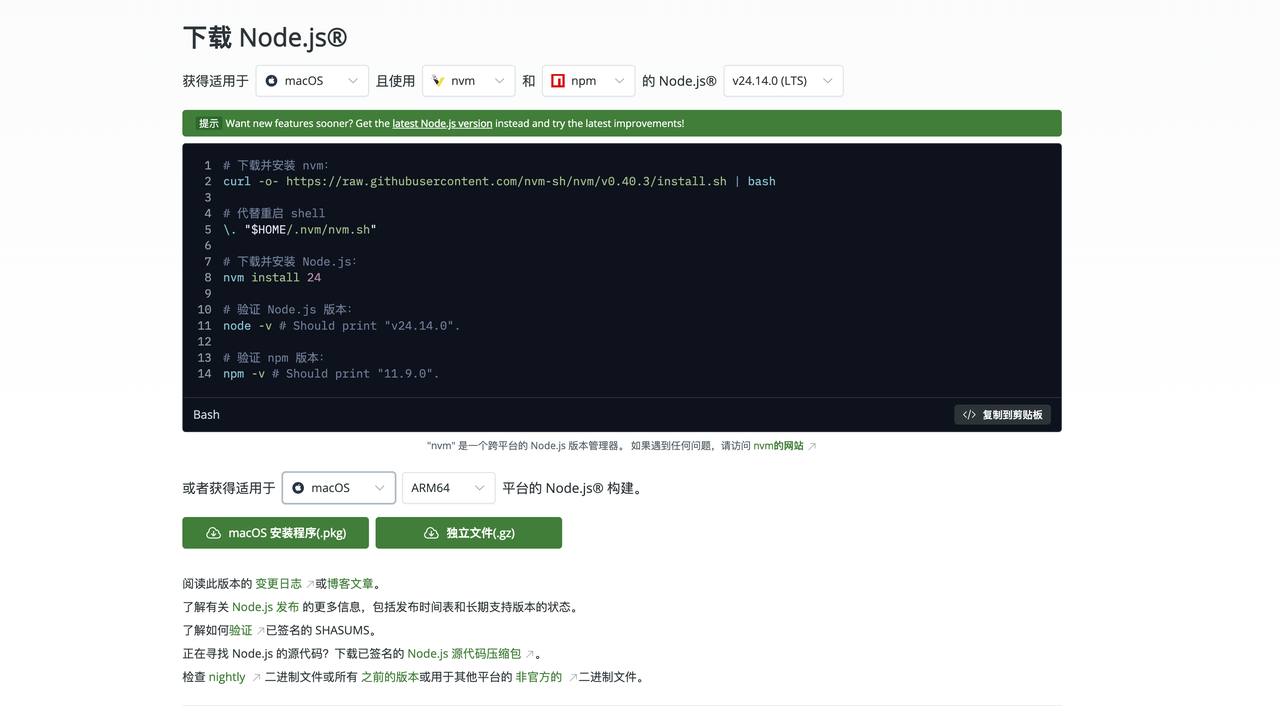
- Open the official site, https://nodejs.org/, and download the LTS version's .pkg installer.
- Double-click the .pkg, then click Continue → Agree → Install. Enter your computer password when prompted.
- Wait for the progress bar to finish and click Close.
Node.js install option 2: Homebrew.
Open a terminal and run a single command:
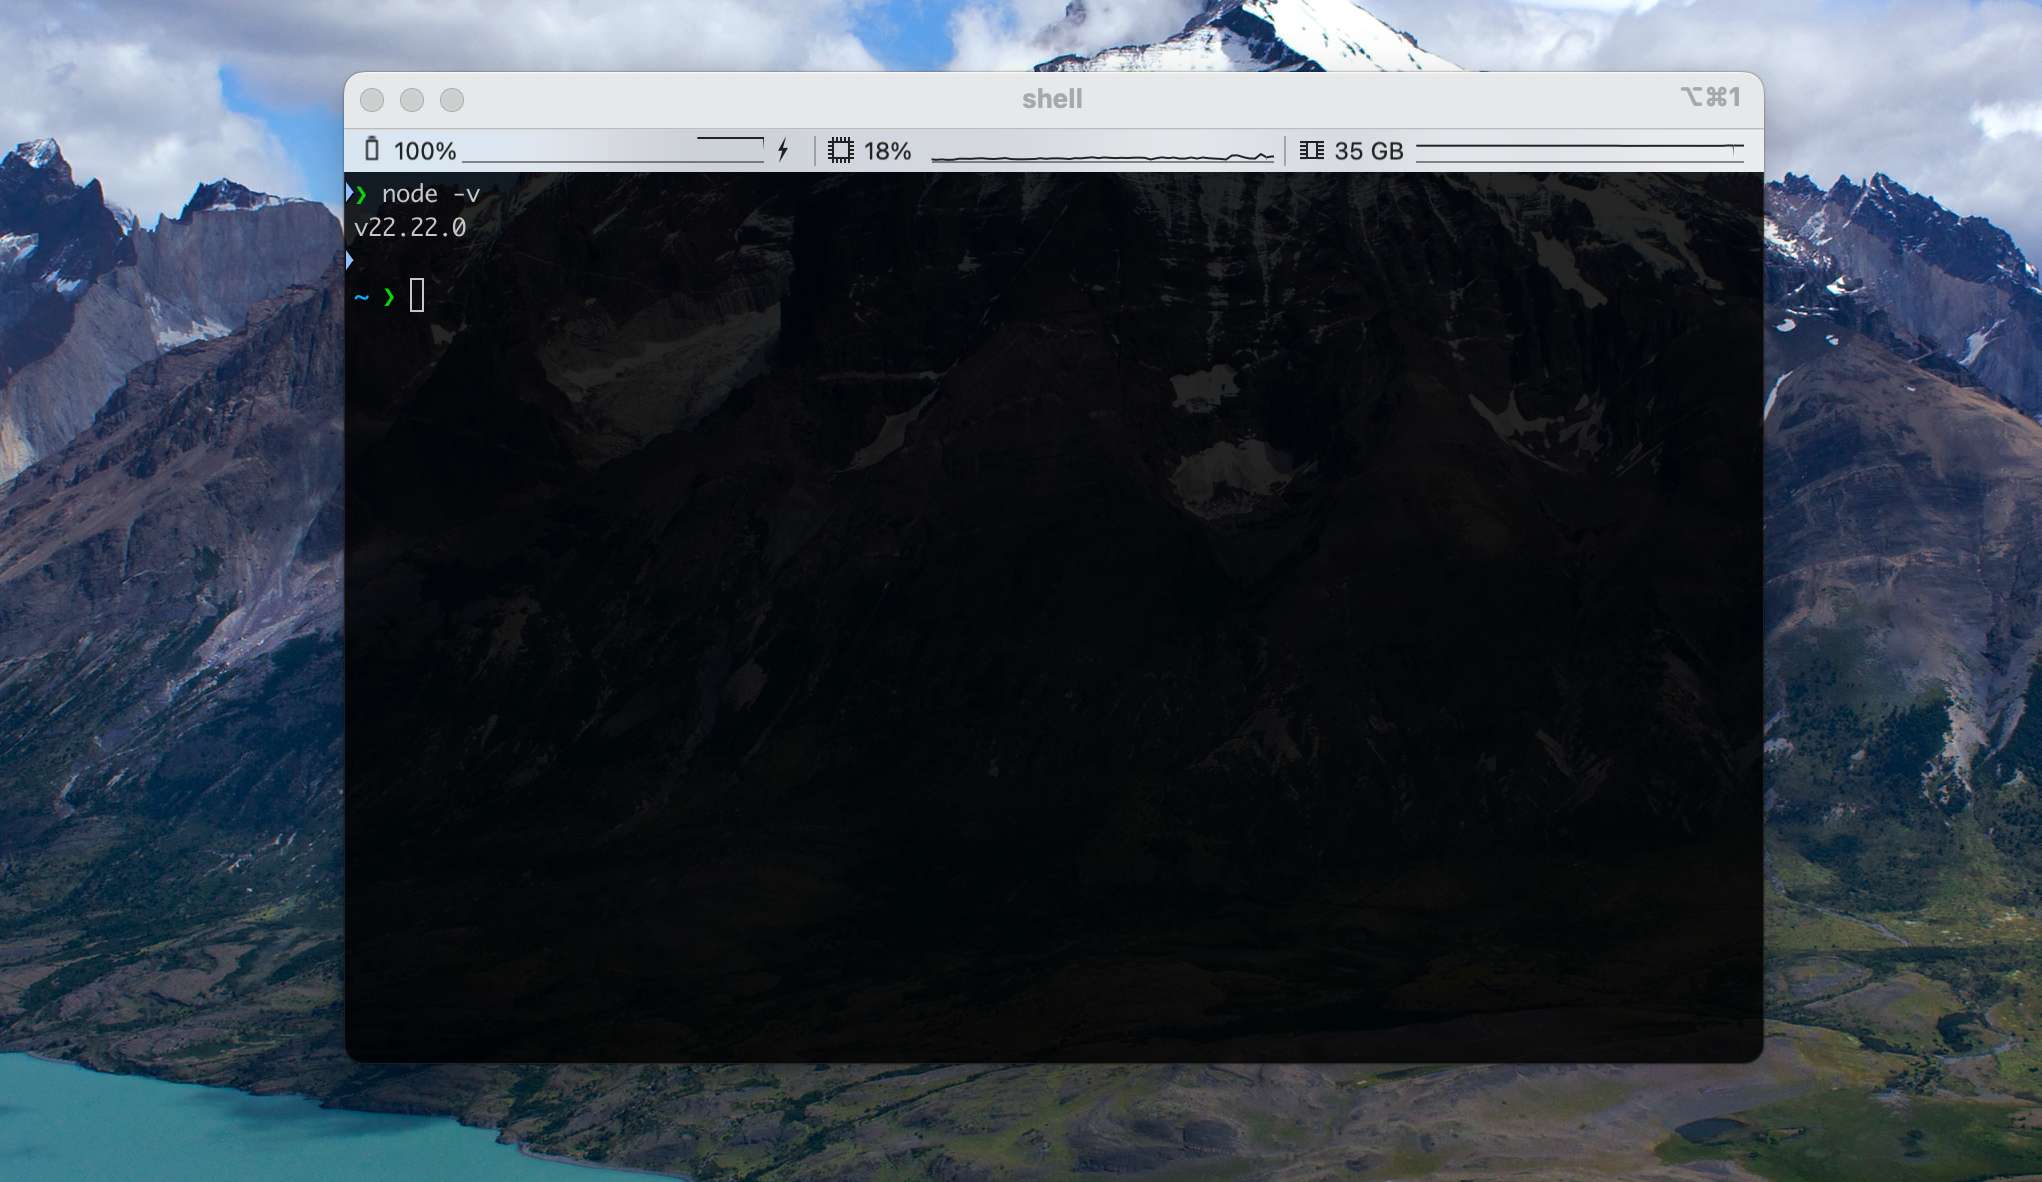
brew install nodeAfter installation, run node --v in the command line. If you see a version >= v22, you're ready for the next step.
Install Command
With Node.js in place, we recommend installing OpenClaw through npm — a single line:
npm install -g openclaw@latestThen sit back and wait a few minutes. Any warnings printed during install are safe to ignore:

Once it's done, run openclaw --version. If you see a version number like the one below, the install succeeded:

Configuration Wizard
Next we run OpenClaw's onboarding wizard to take care of the necessary configuration. Run:
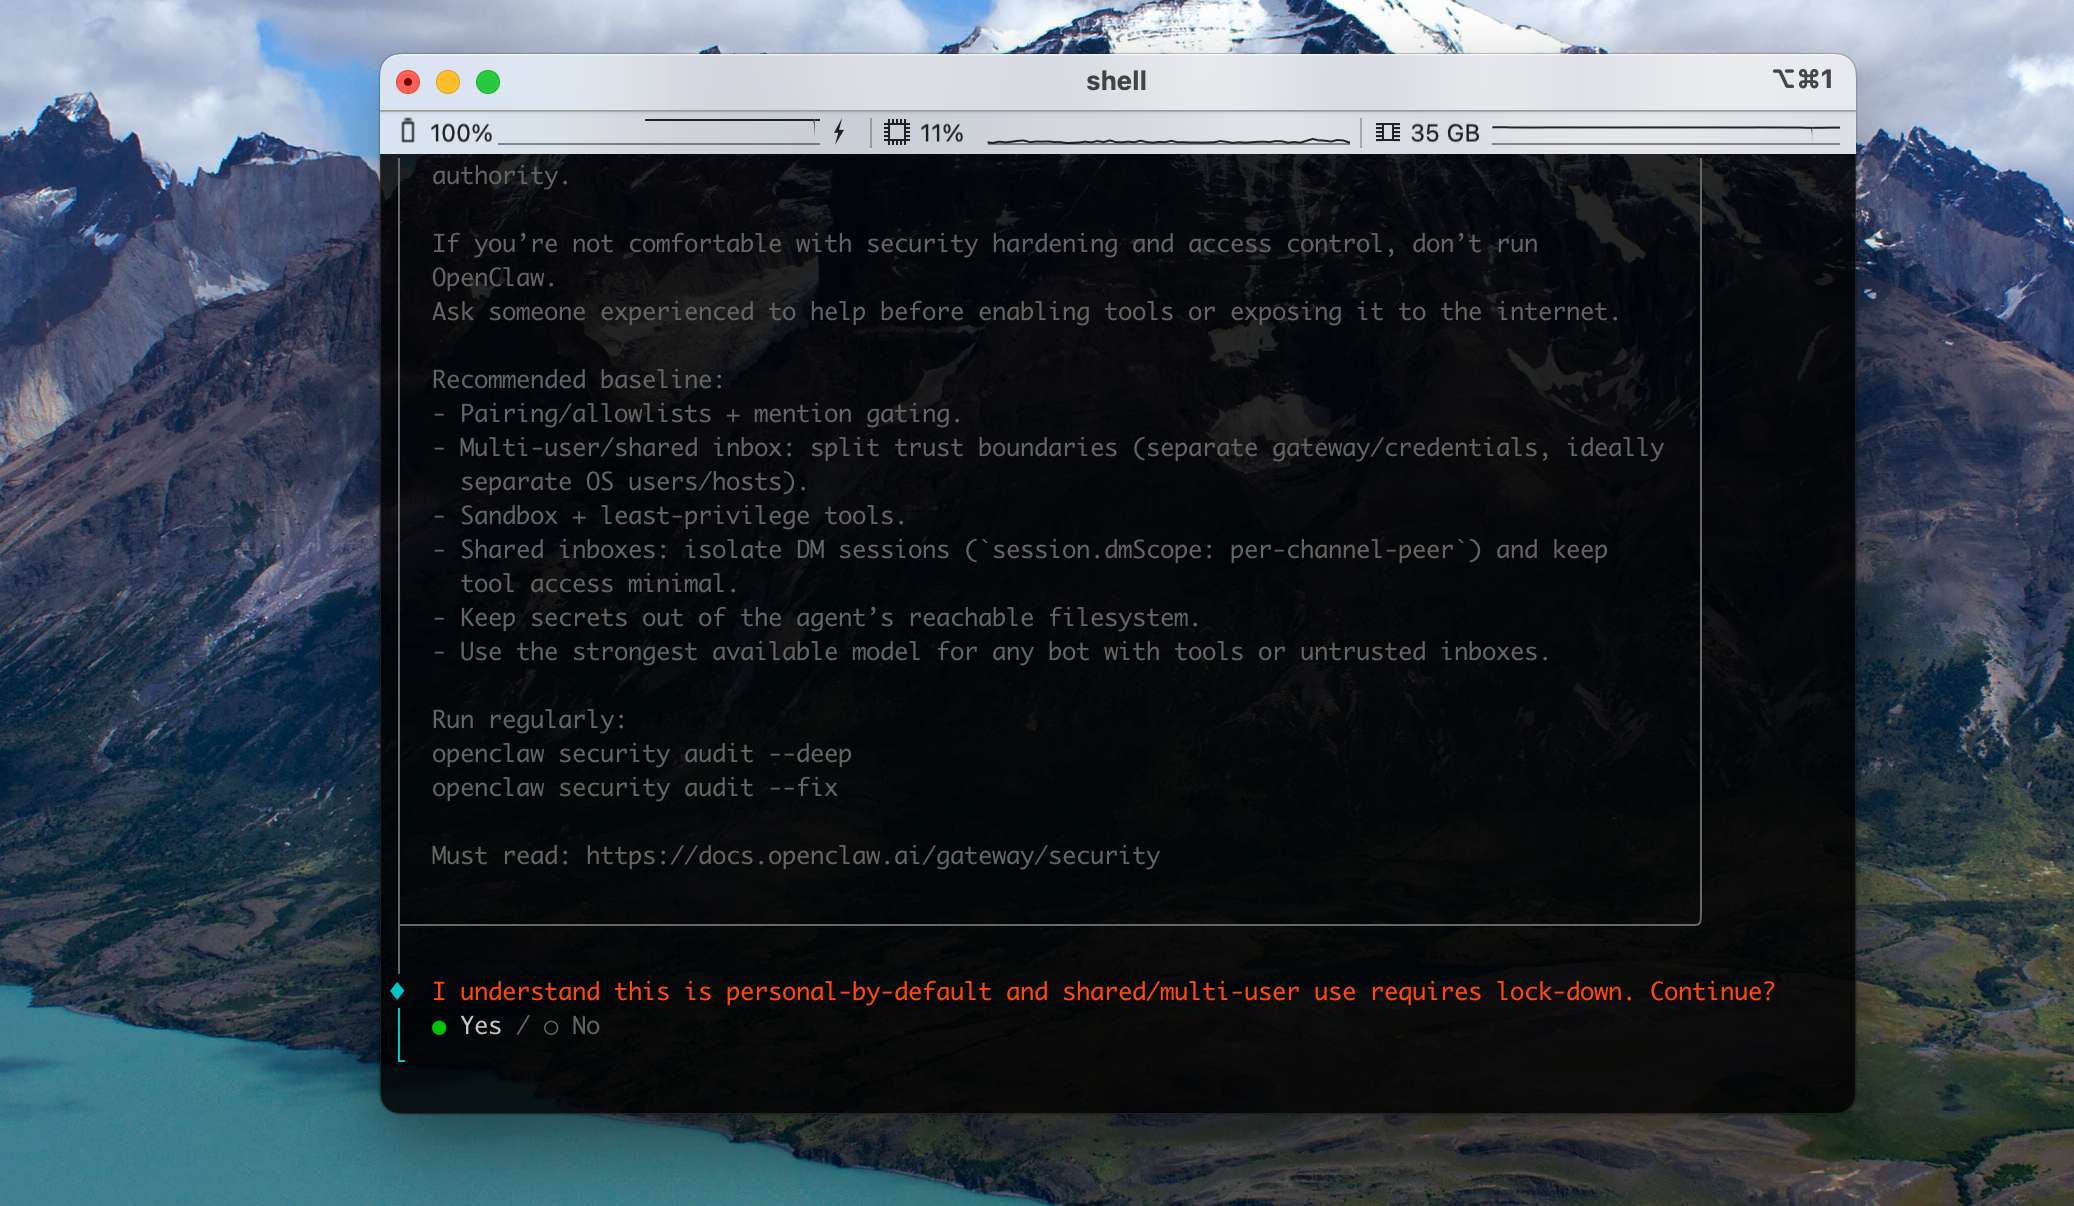
openclaw onboard --install-daemonFirst, OpenClaw will show you a security warning:
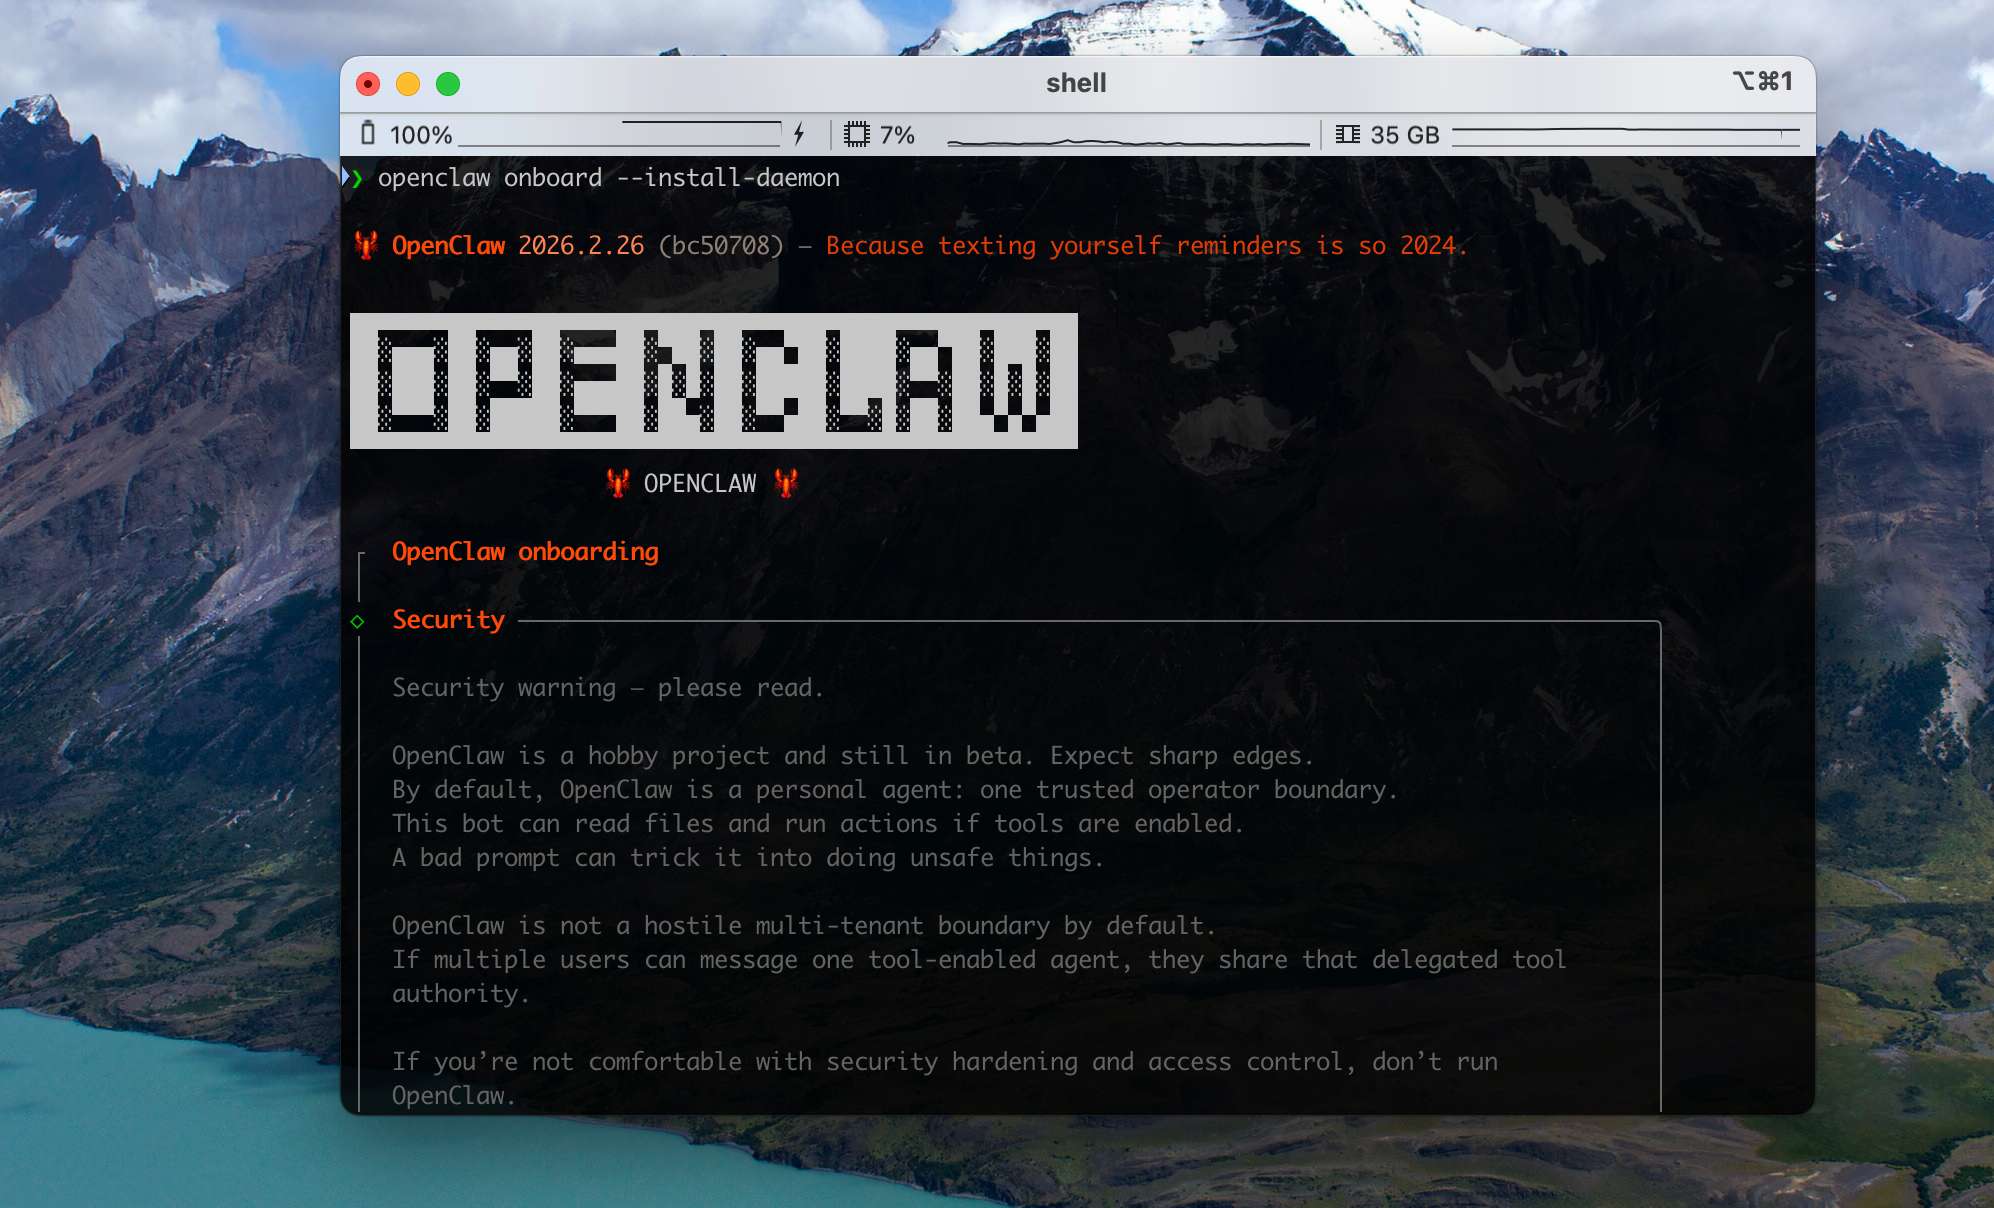
If you consider your current environment safe enough (i.e. you can accept the consequences of a successful attack), choose Yes.
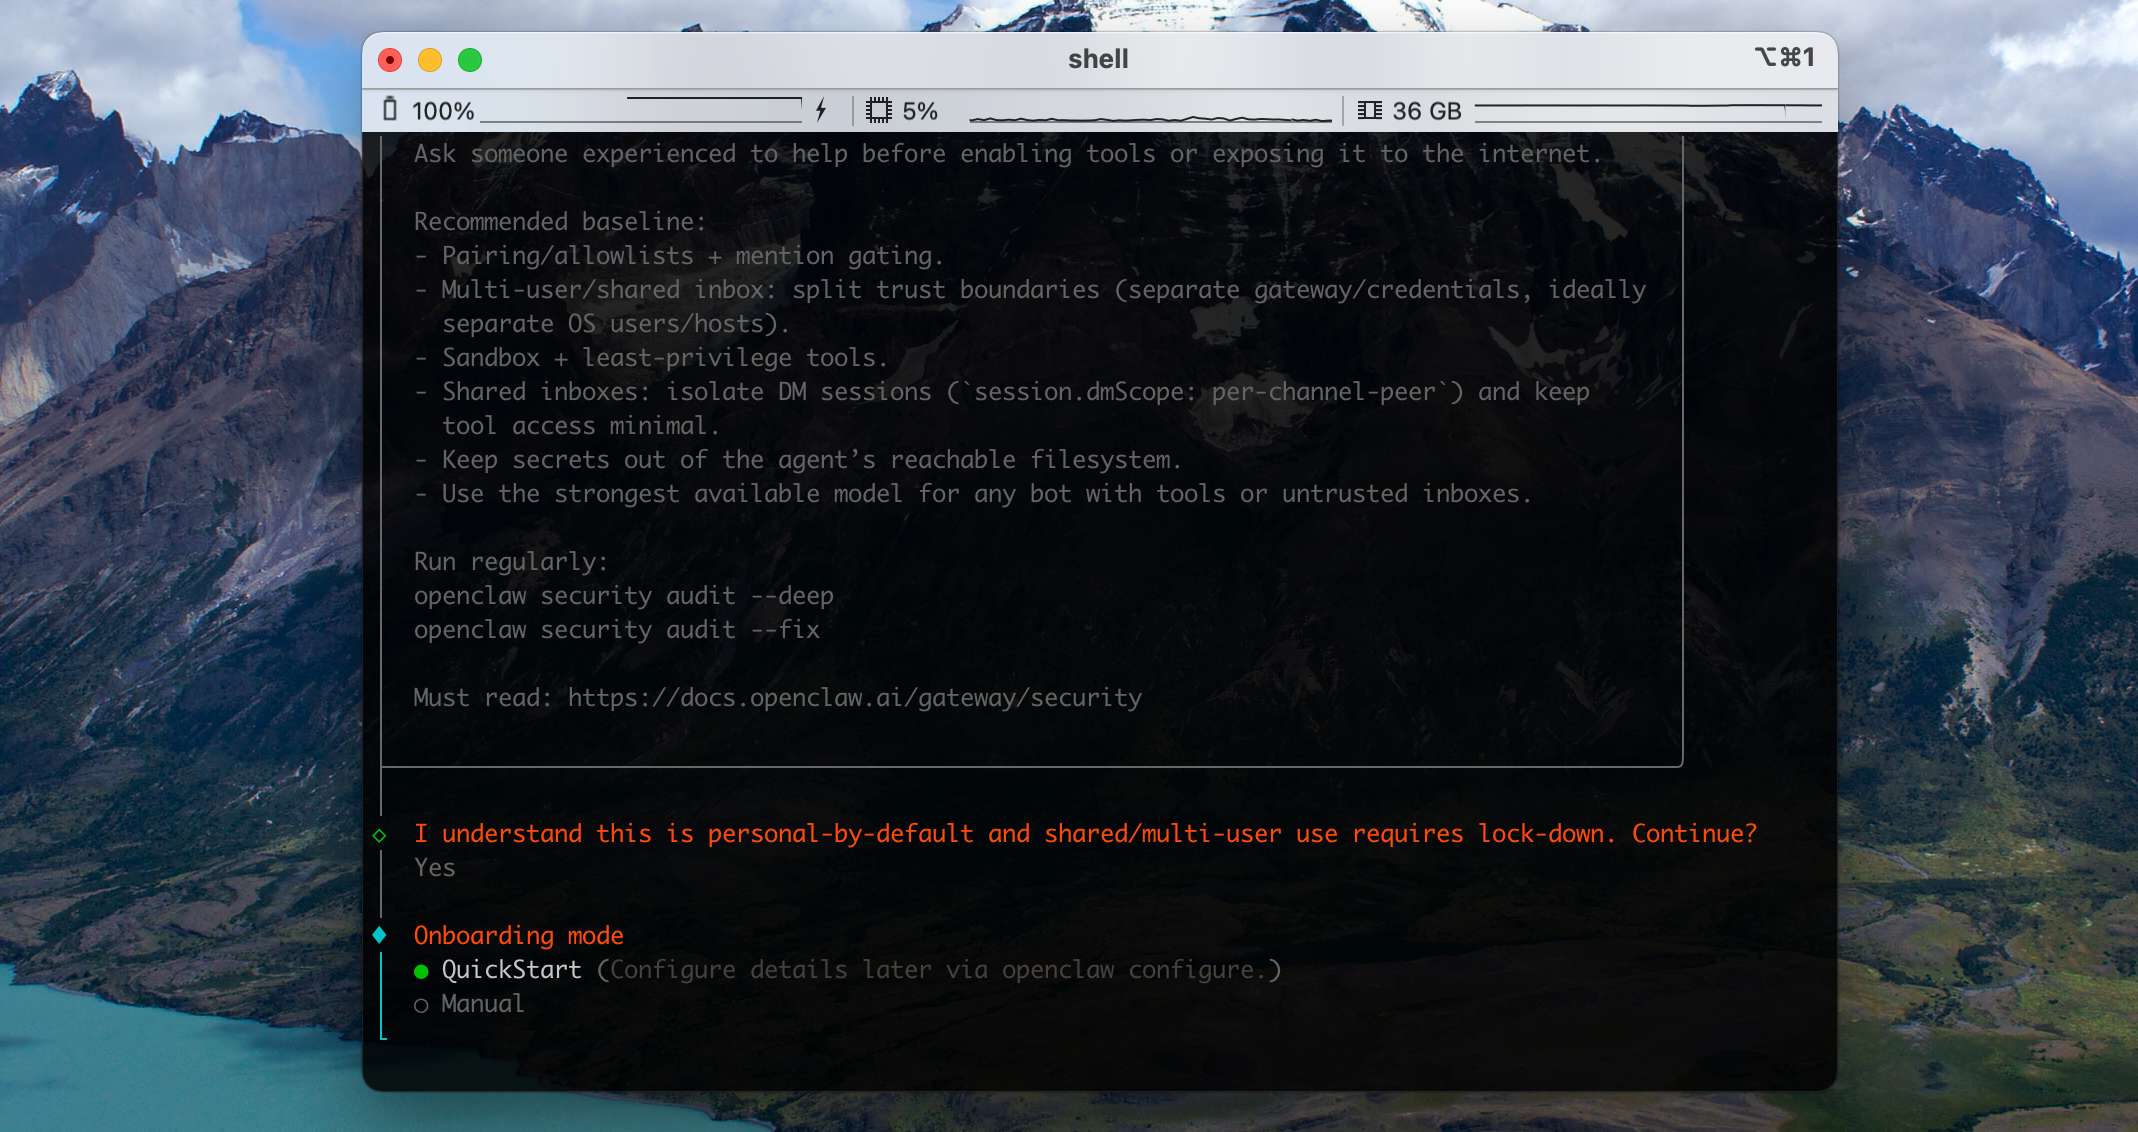
Next it asks you to pick a setup mode. Beginners should choose QuickStart to get up and running fast — every setting can be changed later.
Then it asks you to pick a model provider. If budget is no issue, the flagship Anthropic or OpenAI models give the best results.
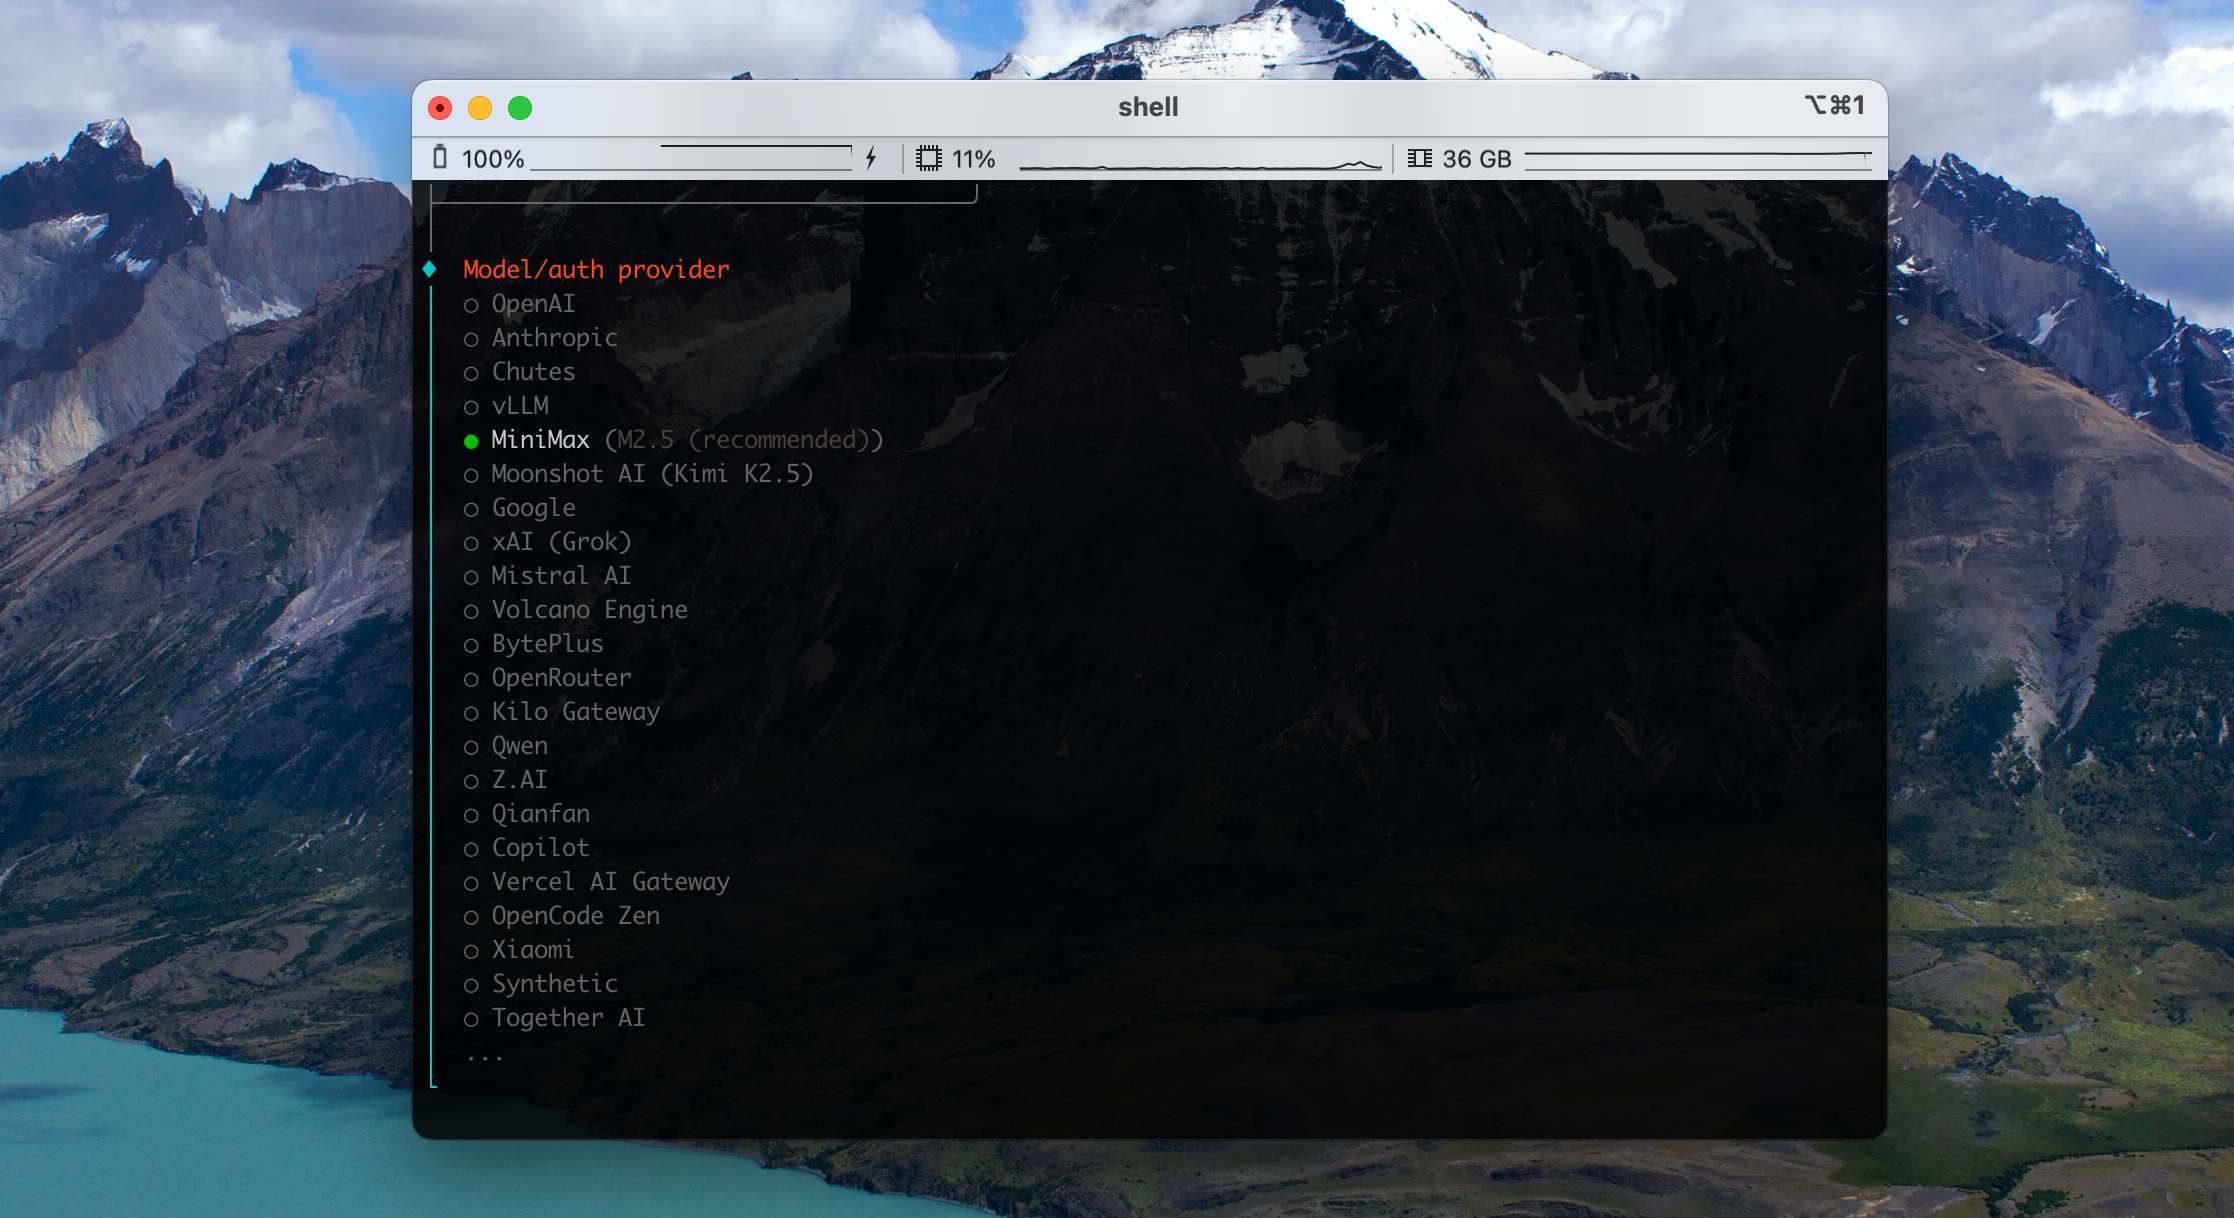
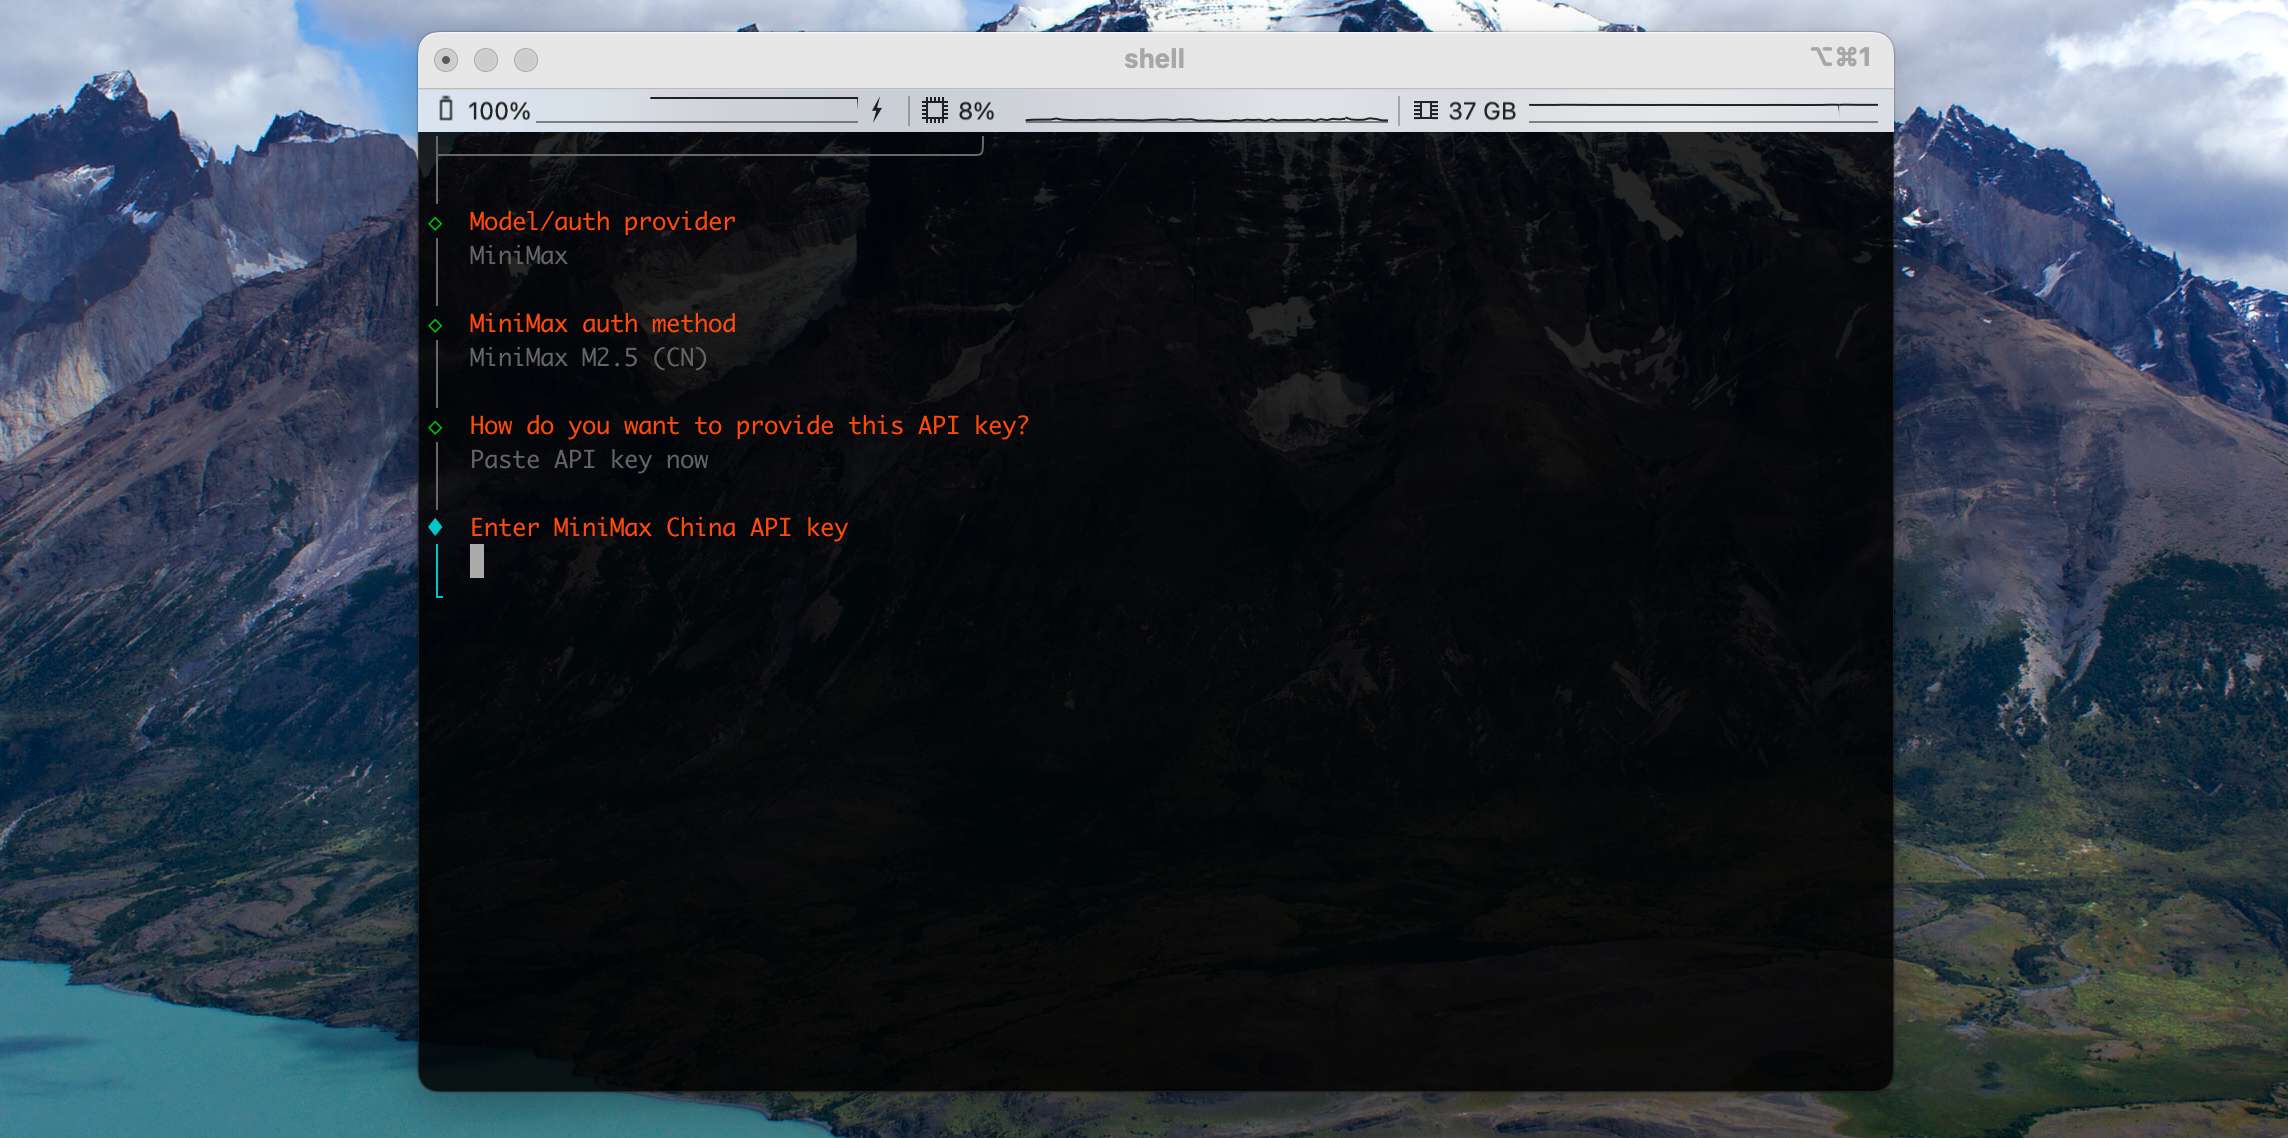
For better cost-performance you can pick Chinese providers like GLM, MiniMax, or Qwen — for example we'll start with MiniMax. It will then ask for your API Key:
If your model provider isn't in the recommended list, or you need to configure a custom local model service, choose Skip for now — we'll come back to it later in the Gateway.

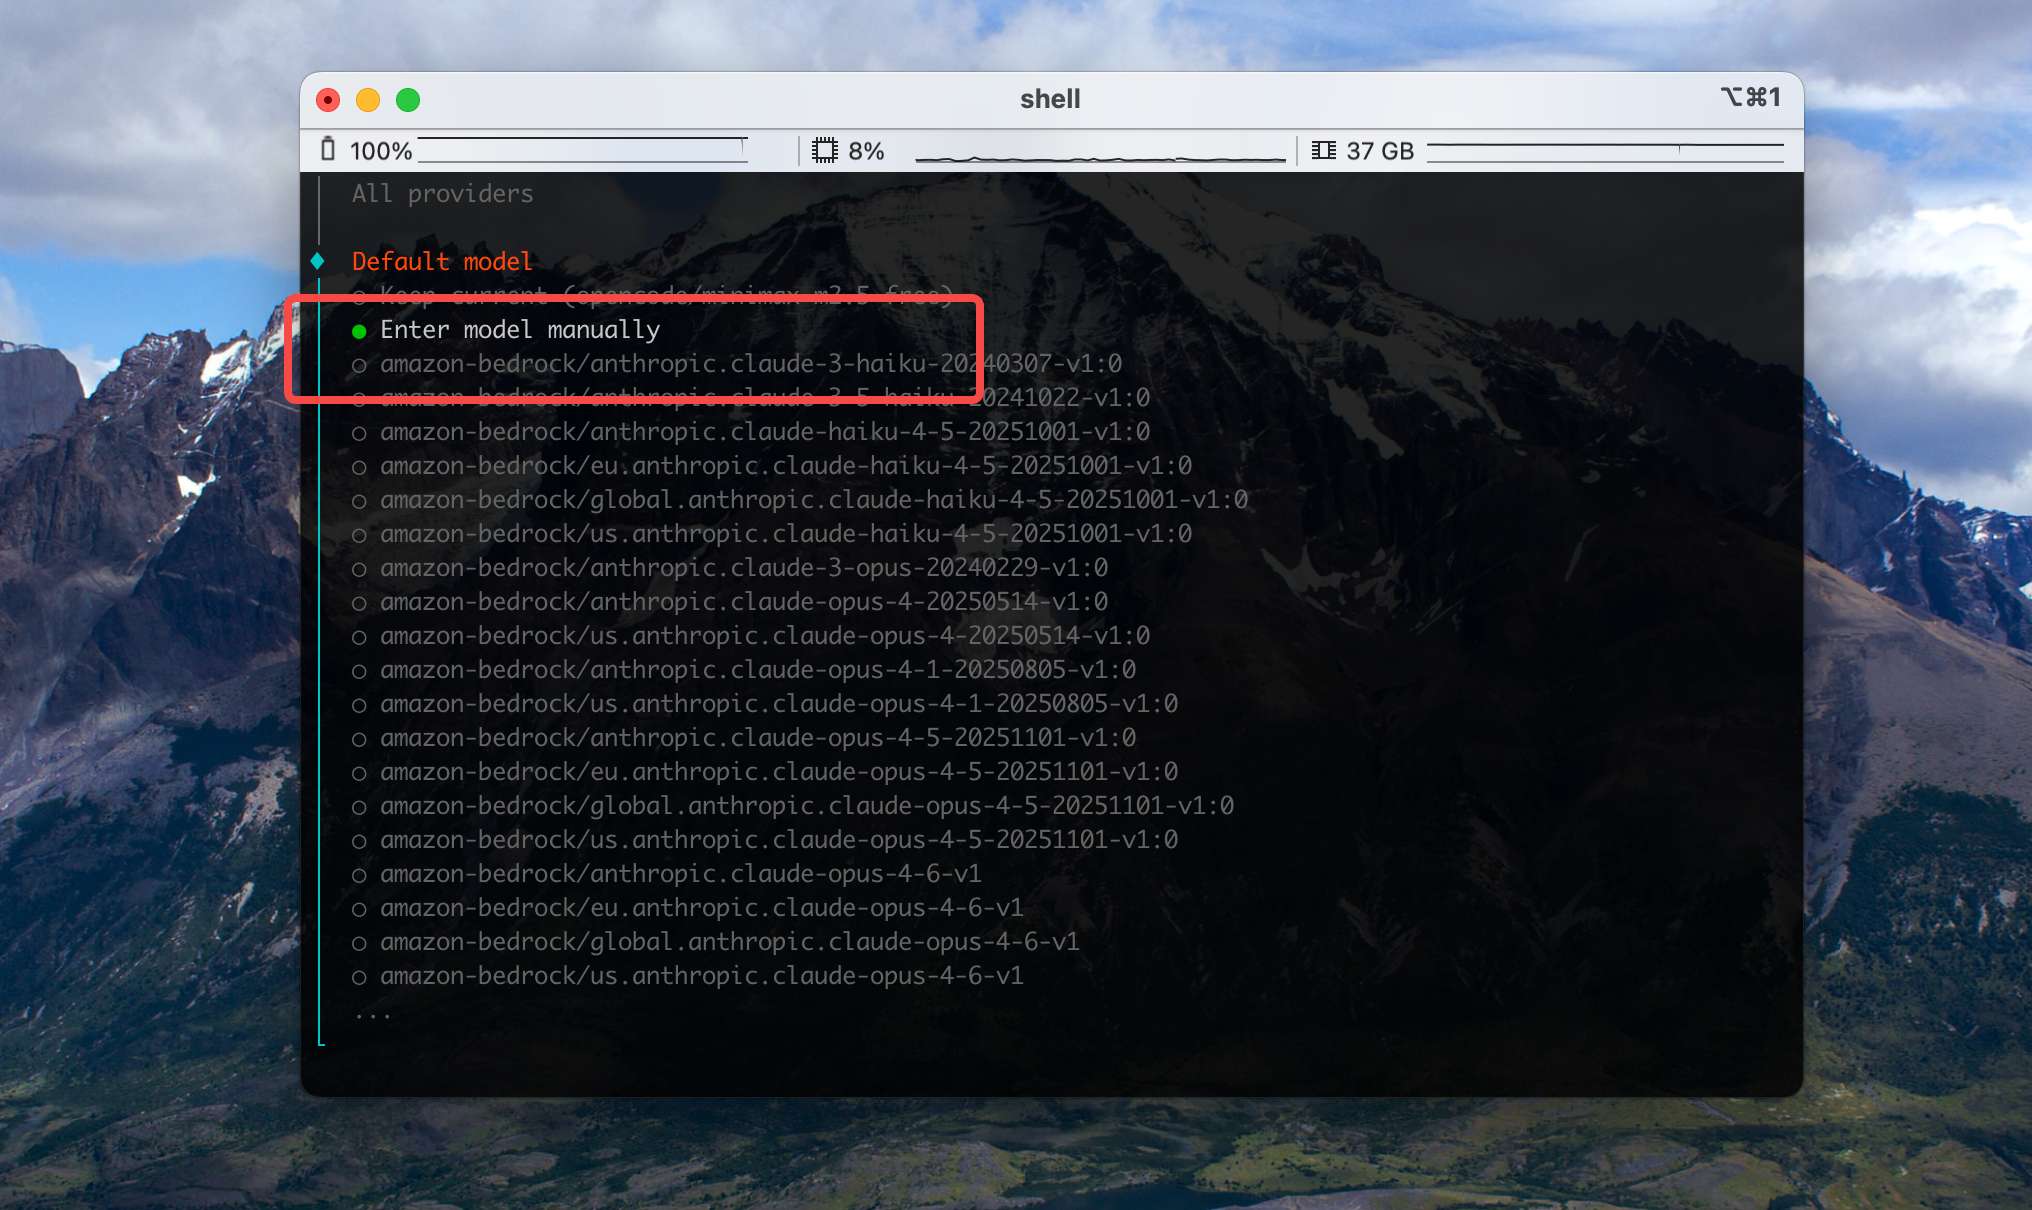
Next is model selection. Pick a model that matches the provider you chose in the previous step. If you want to customize a model later, choose Enter model manually here.
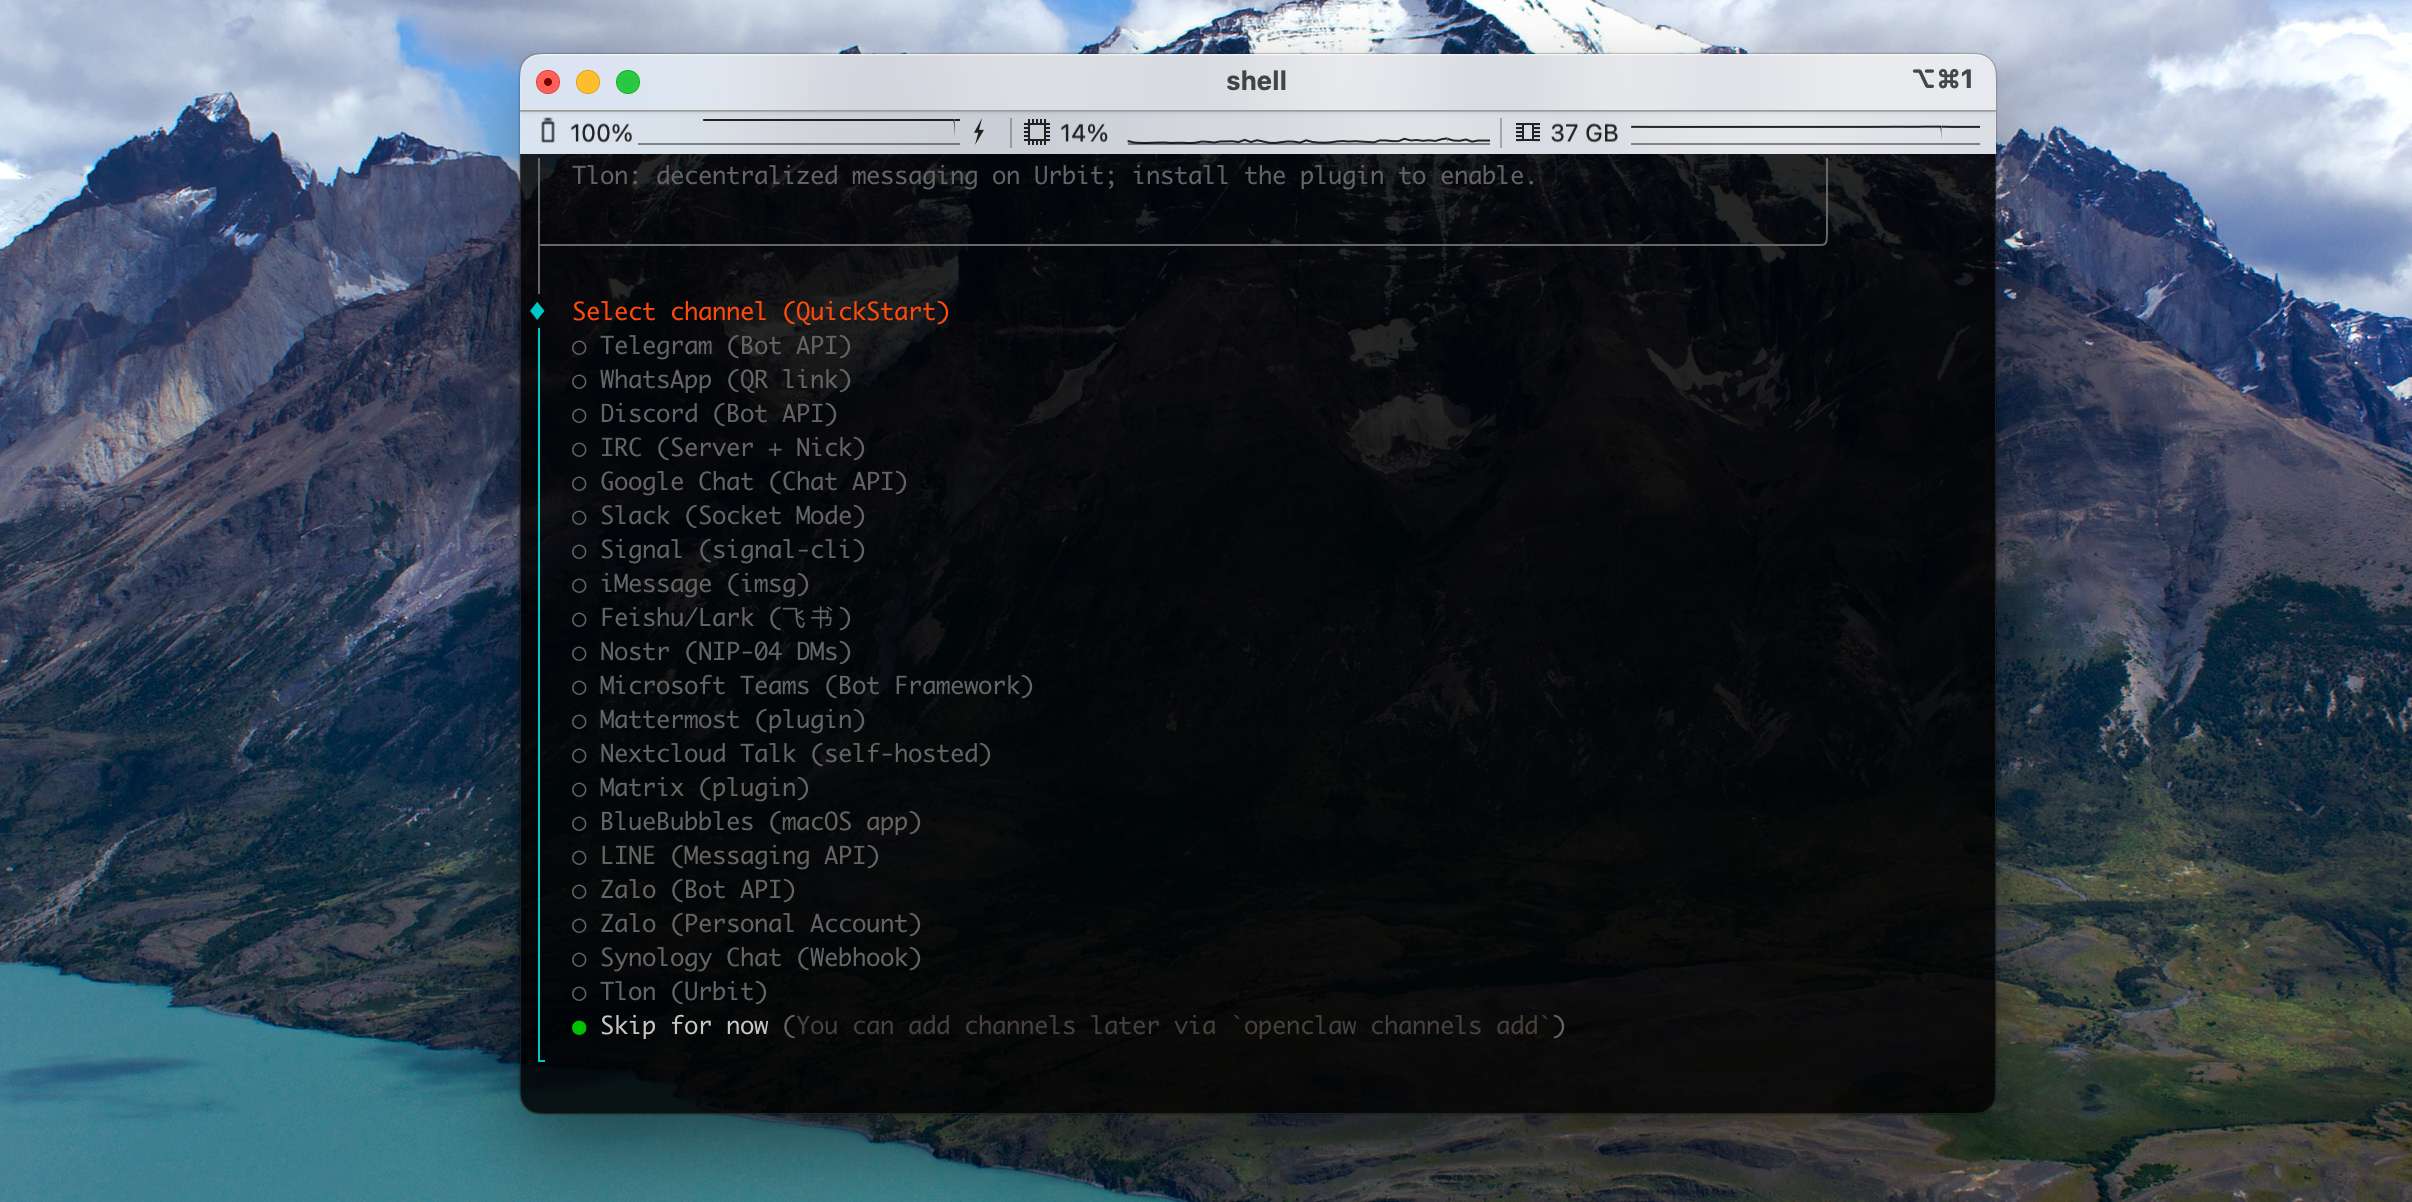
The next step asks you to configure a Channel. Skip it for now — we want to make sure the base flow works before bringing third-party platforms into the picture, since it makes troubleshooting easier.
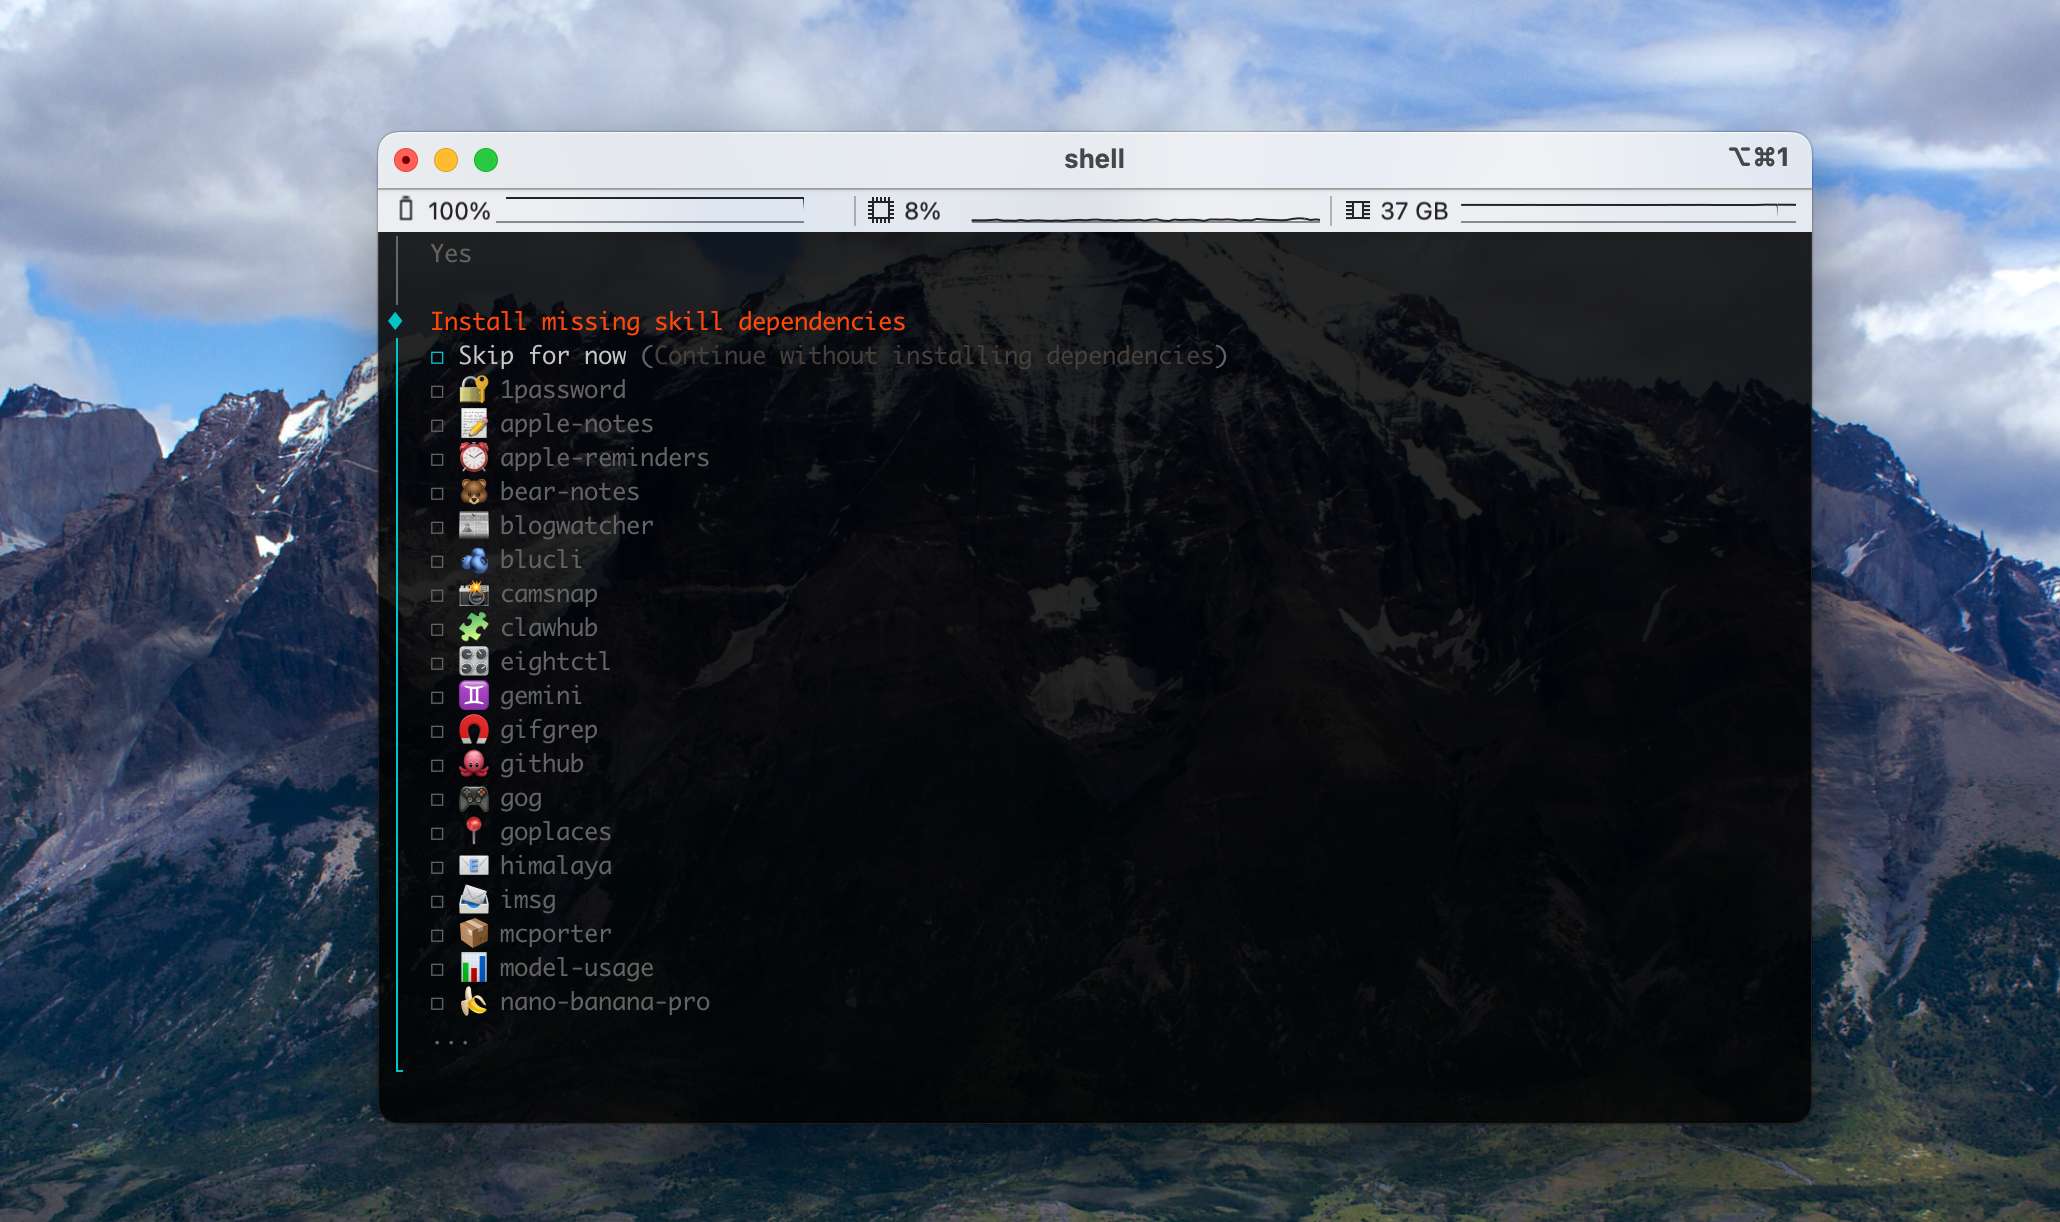
Next it offers to install Skills. To keep the basic flow simple, choose Skip for now — we'll configure them through the web UI later.
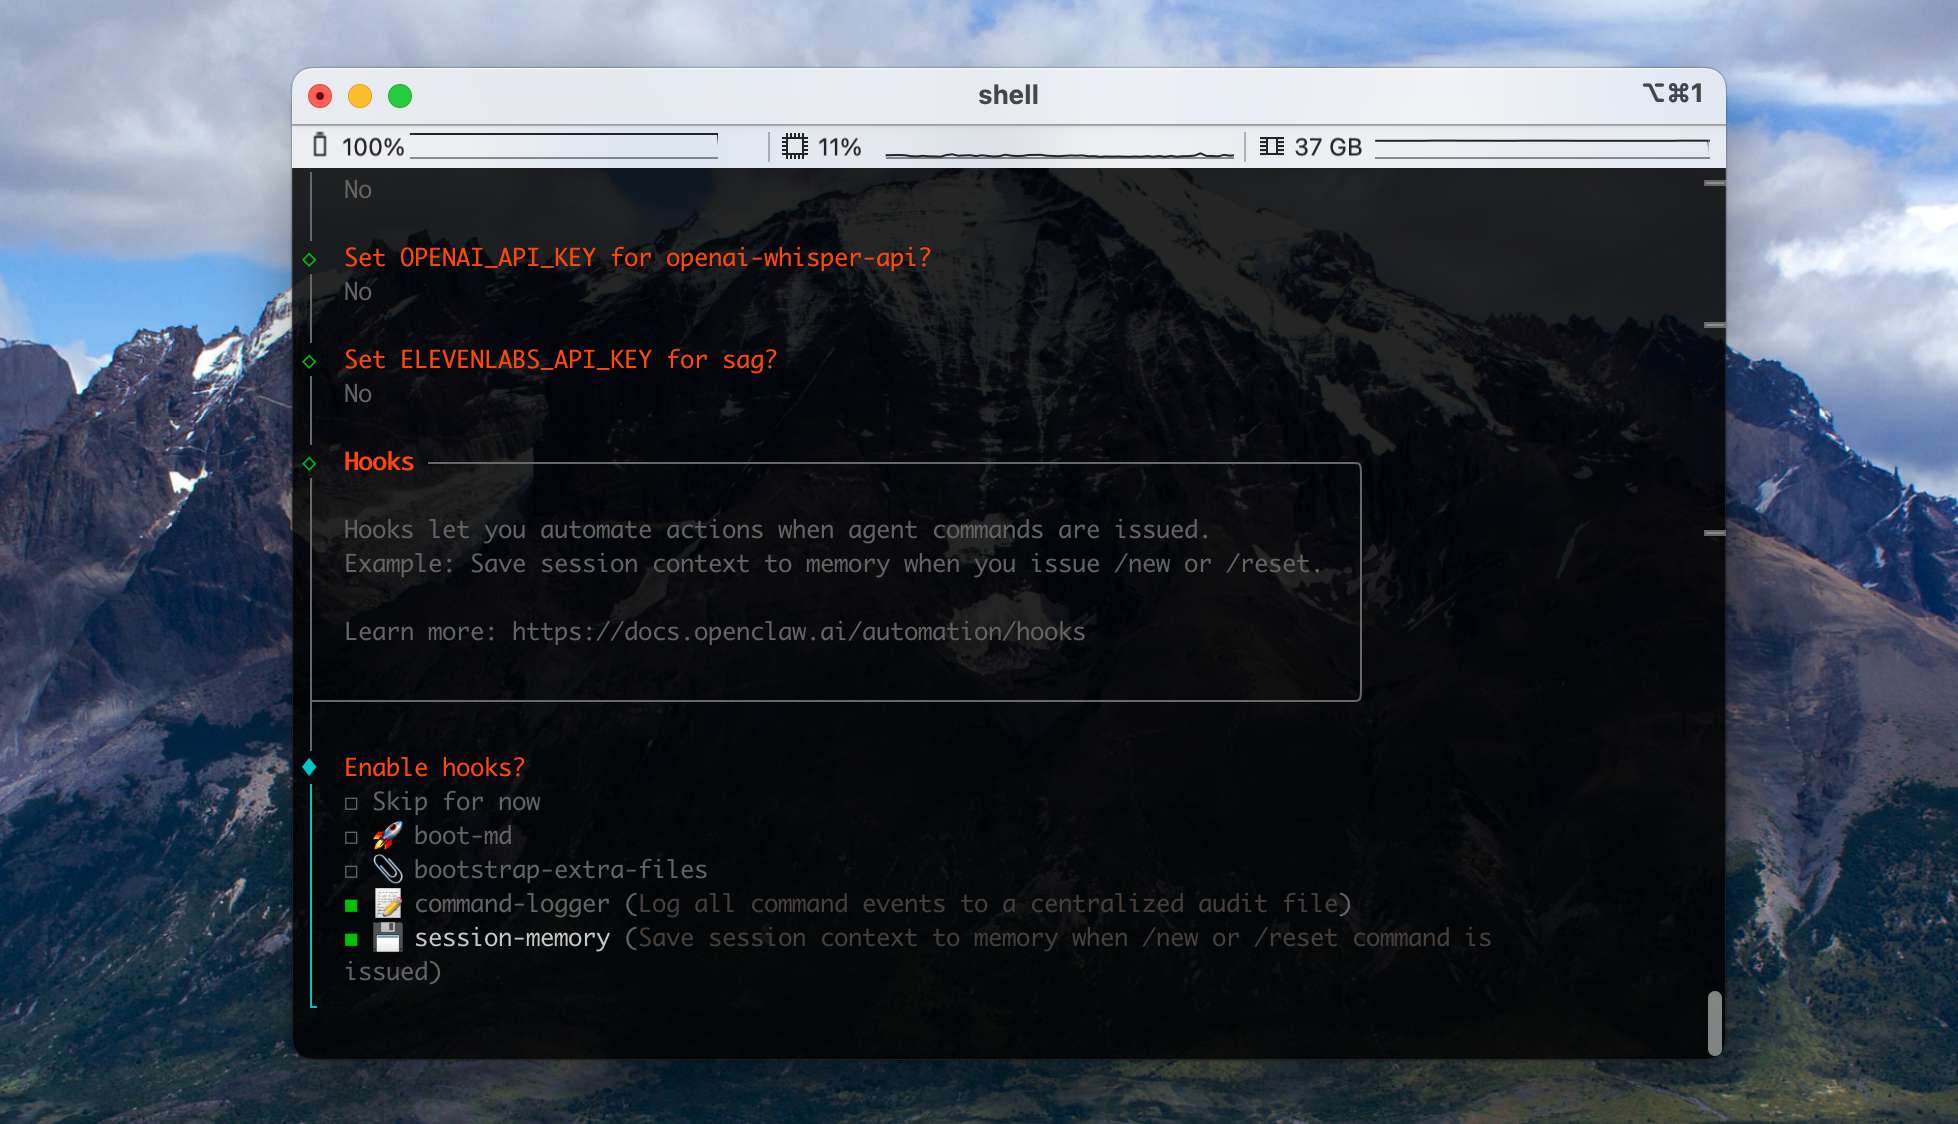
Then it asks you to configure Hooks. We recommend turning these two on (use space to select, then Enter):
- command-logger: writes every command-related event in the system to a single centralized audit file. Very useful for debugging.
- session-memory: when the user runs /new or /reset, saves the current session context into memory so session state isn't lost.
After Hooks, the wizard will automatically configure the Gateway. Accept the default TUI options to finish the install.
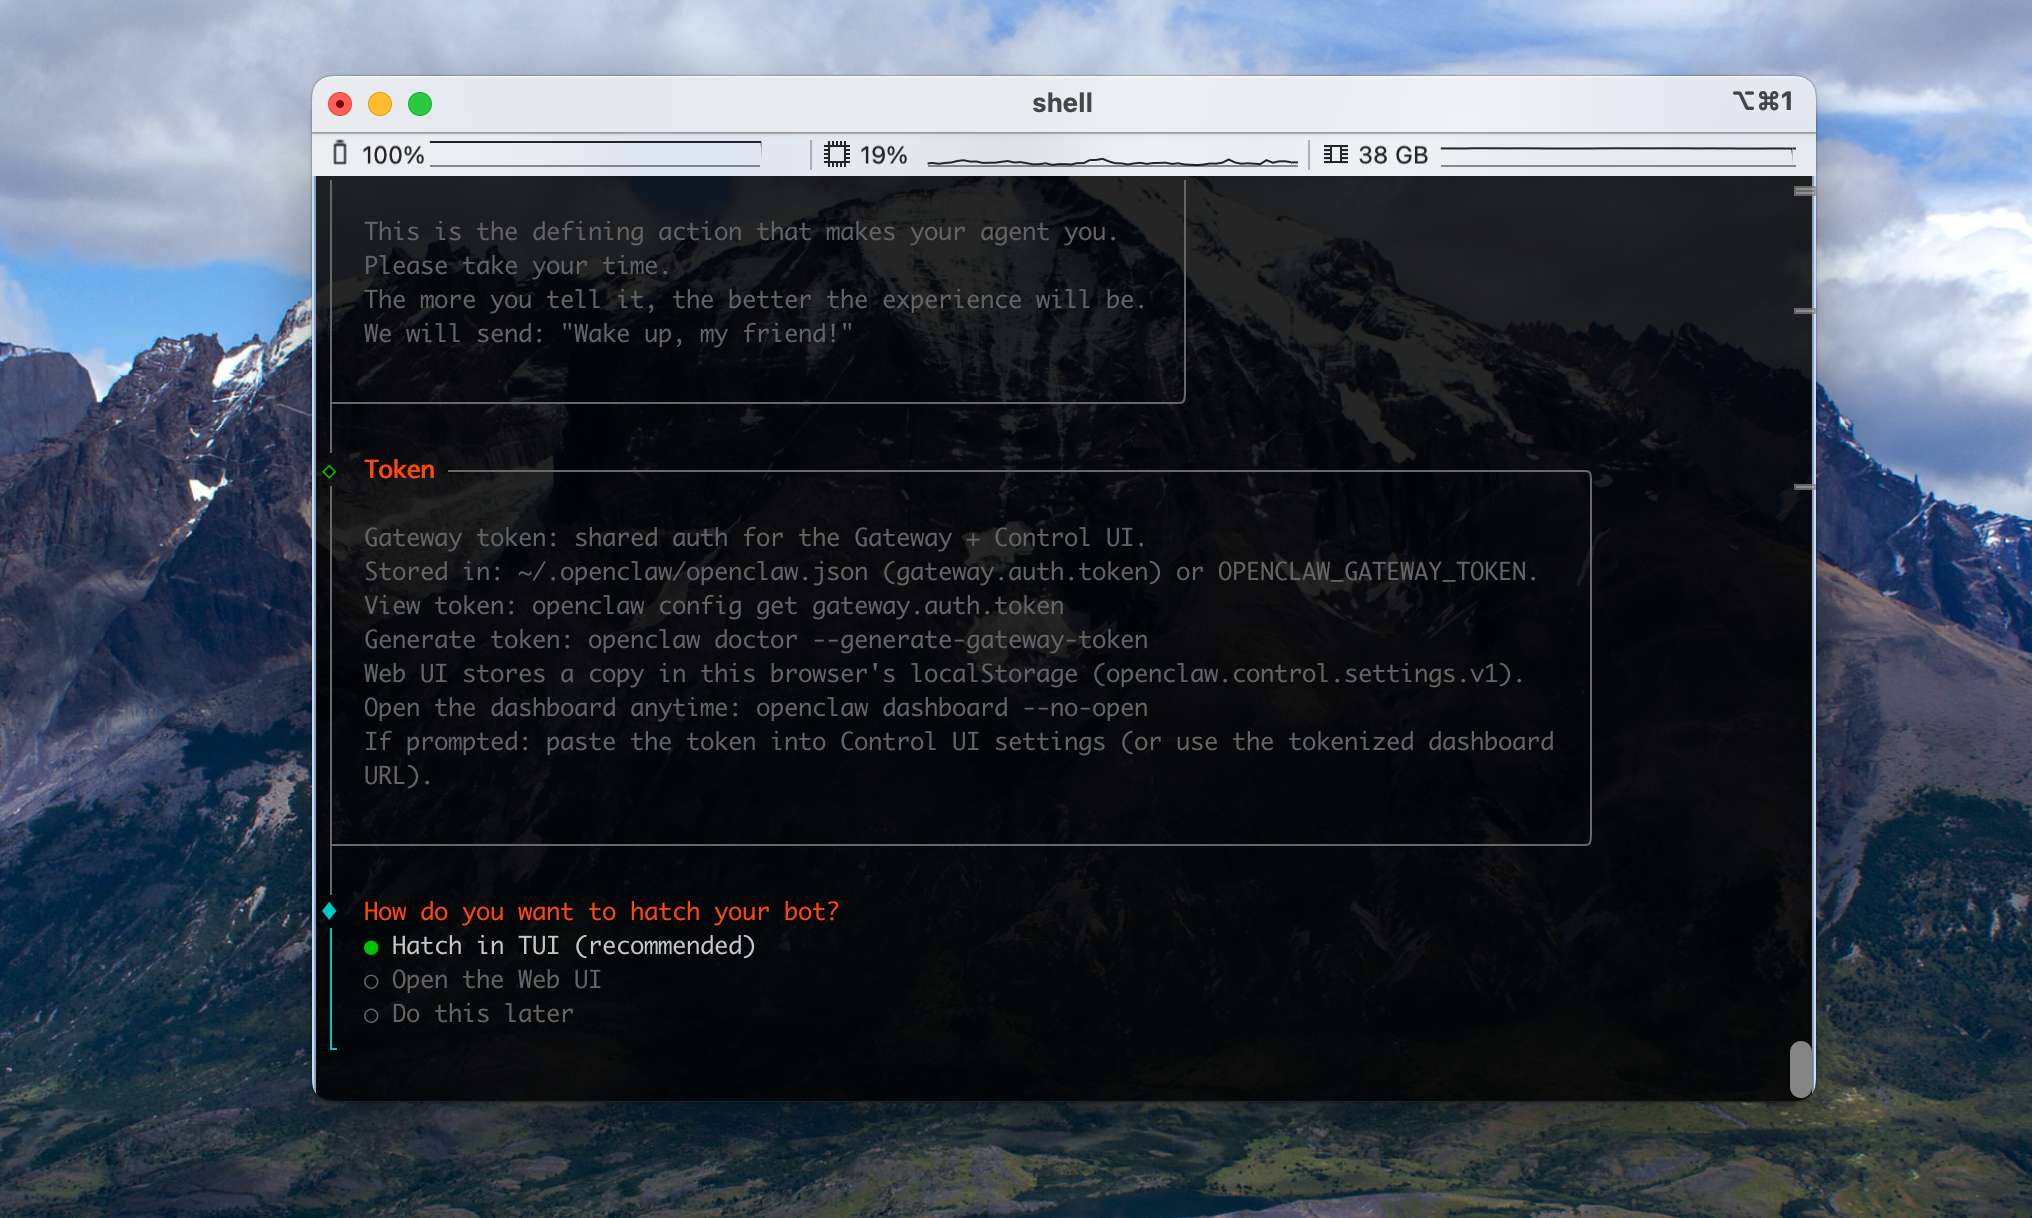
Scroll back up in the terminal and you'll see the WebUI URL with its access Token:
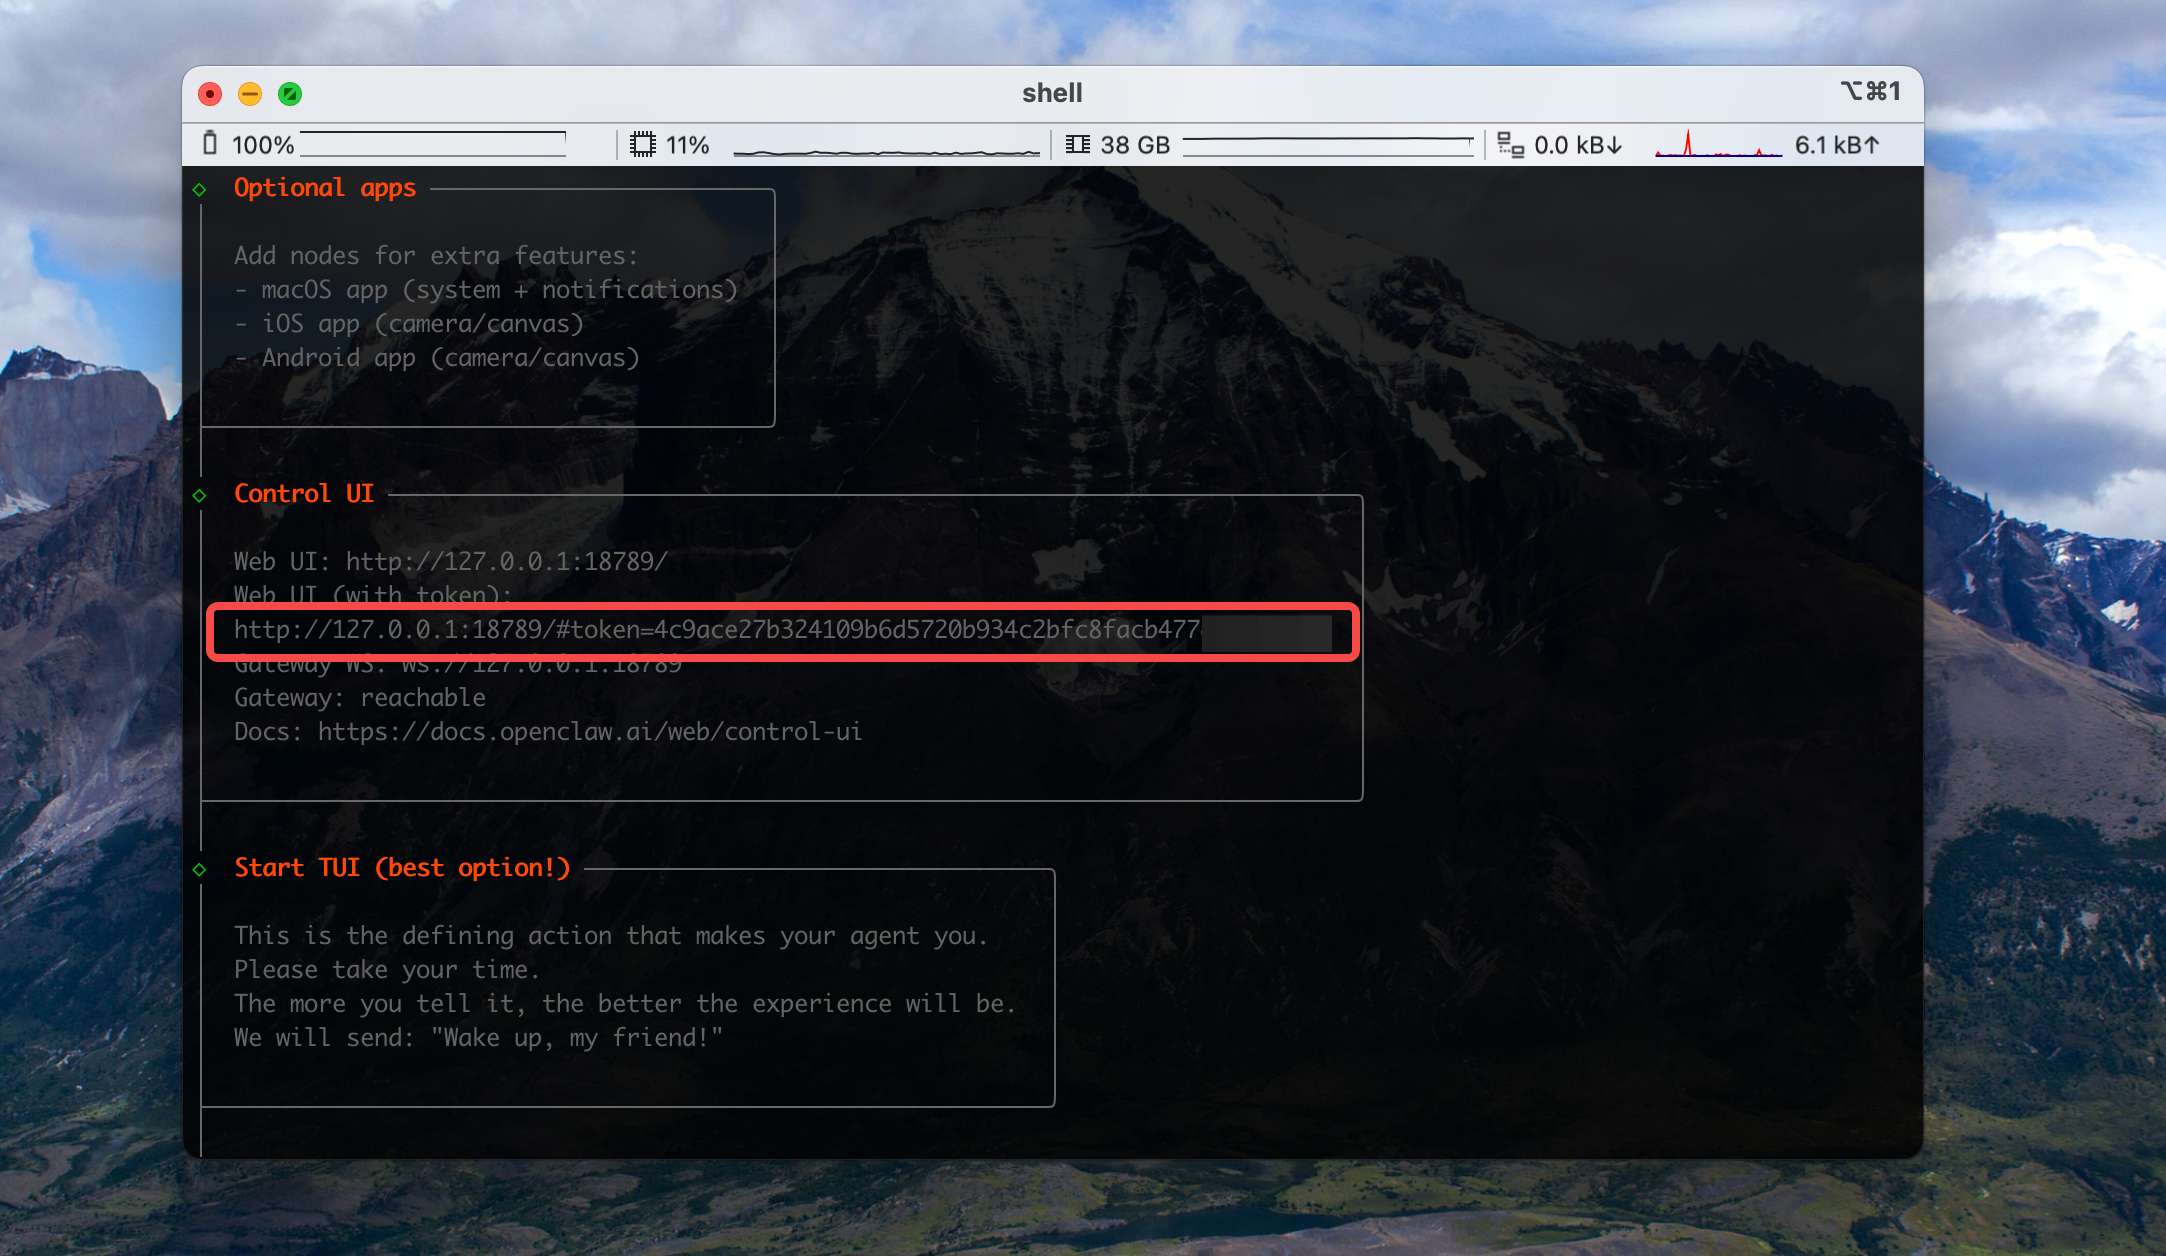
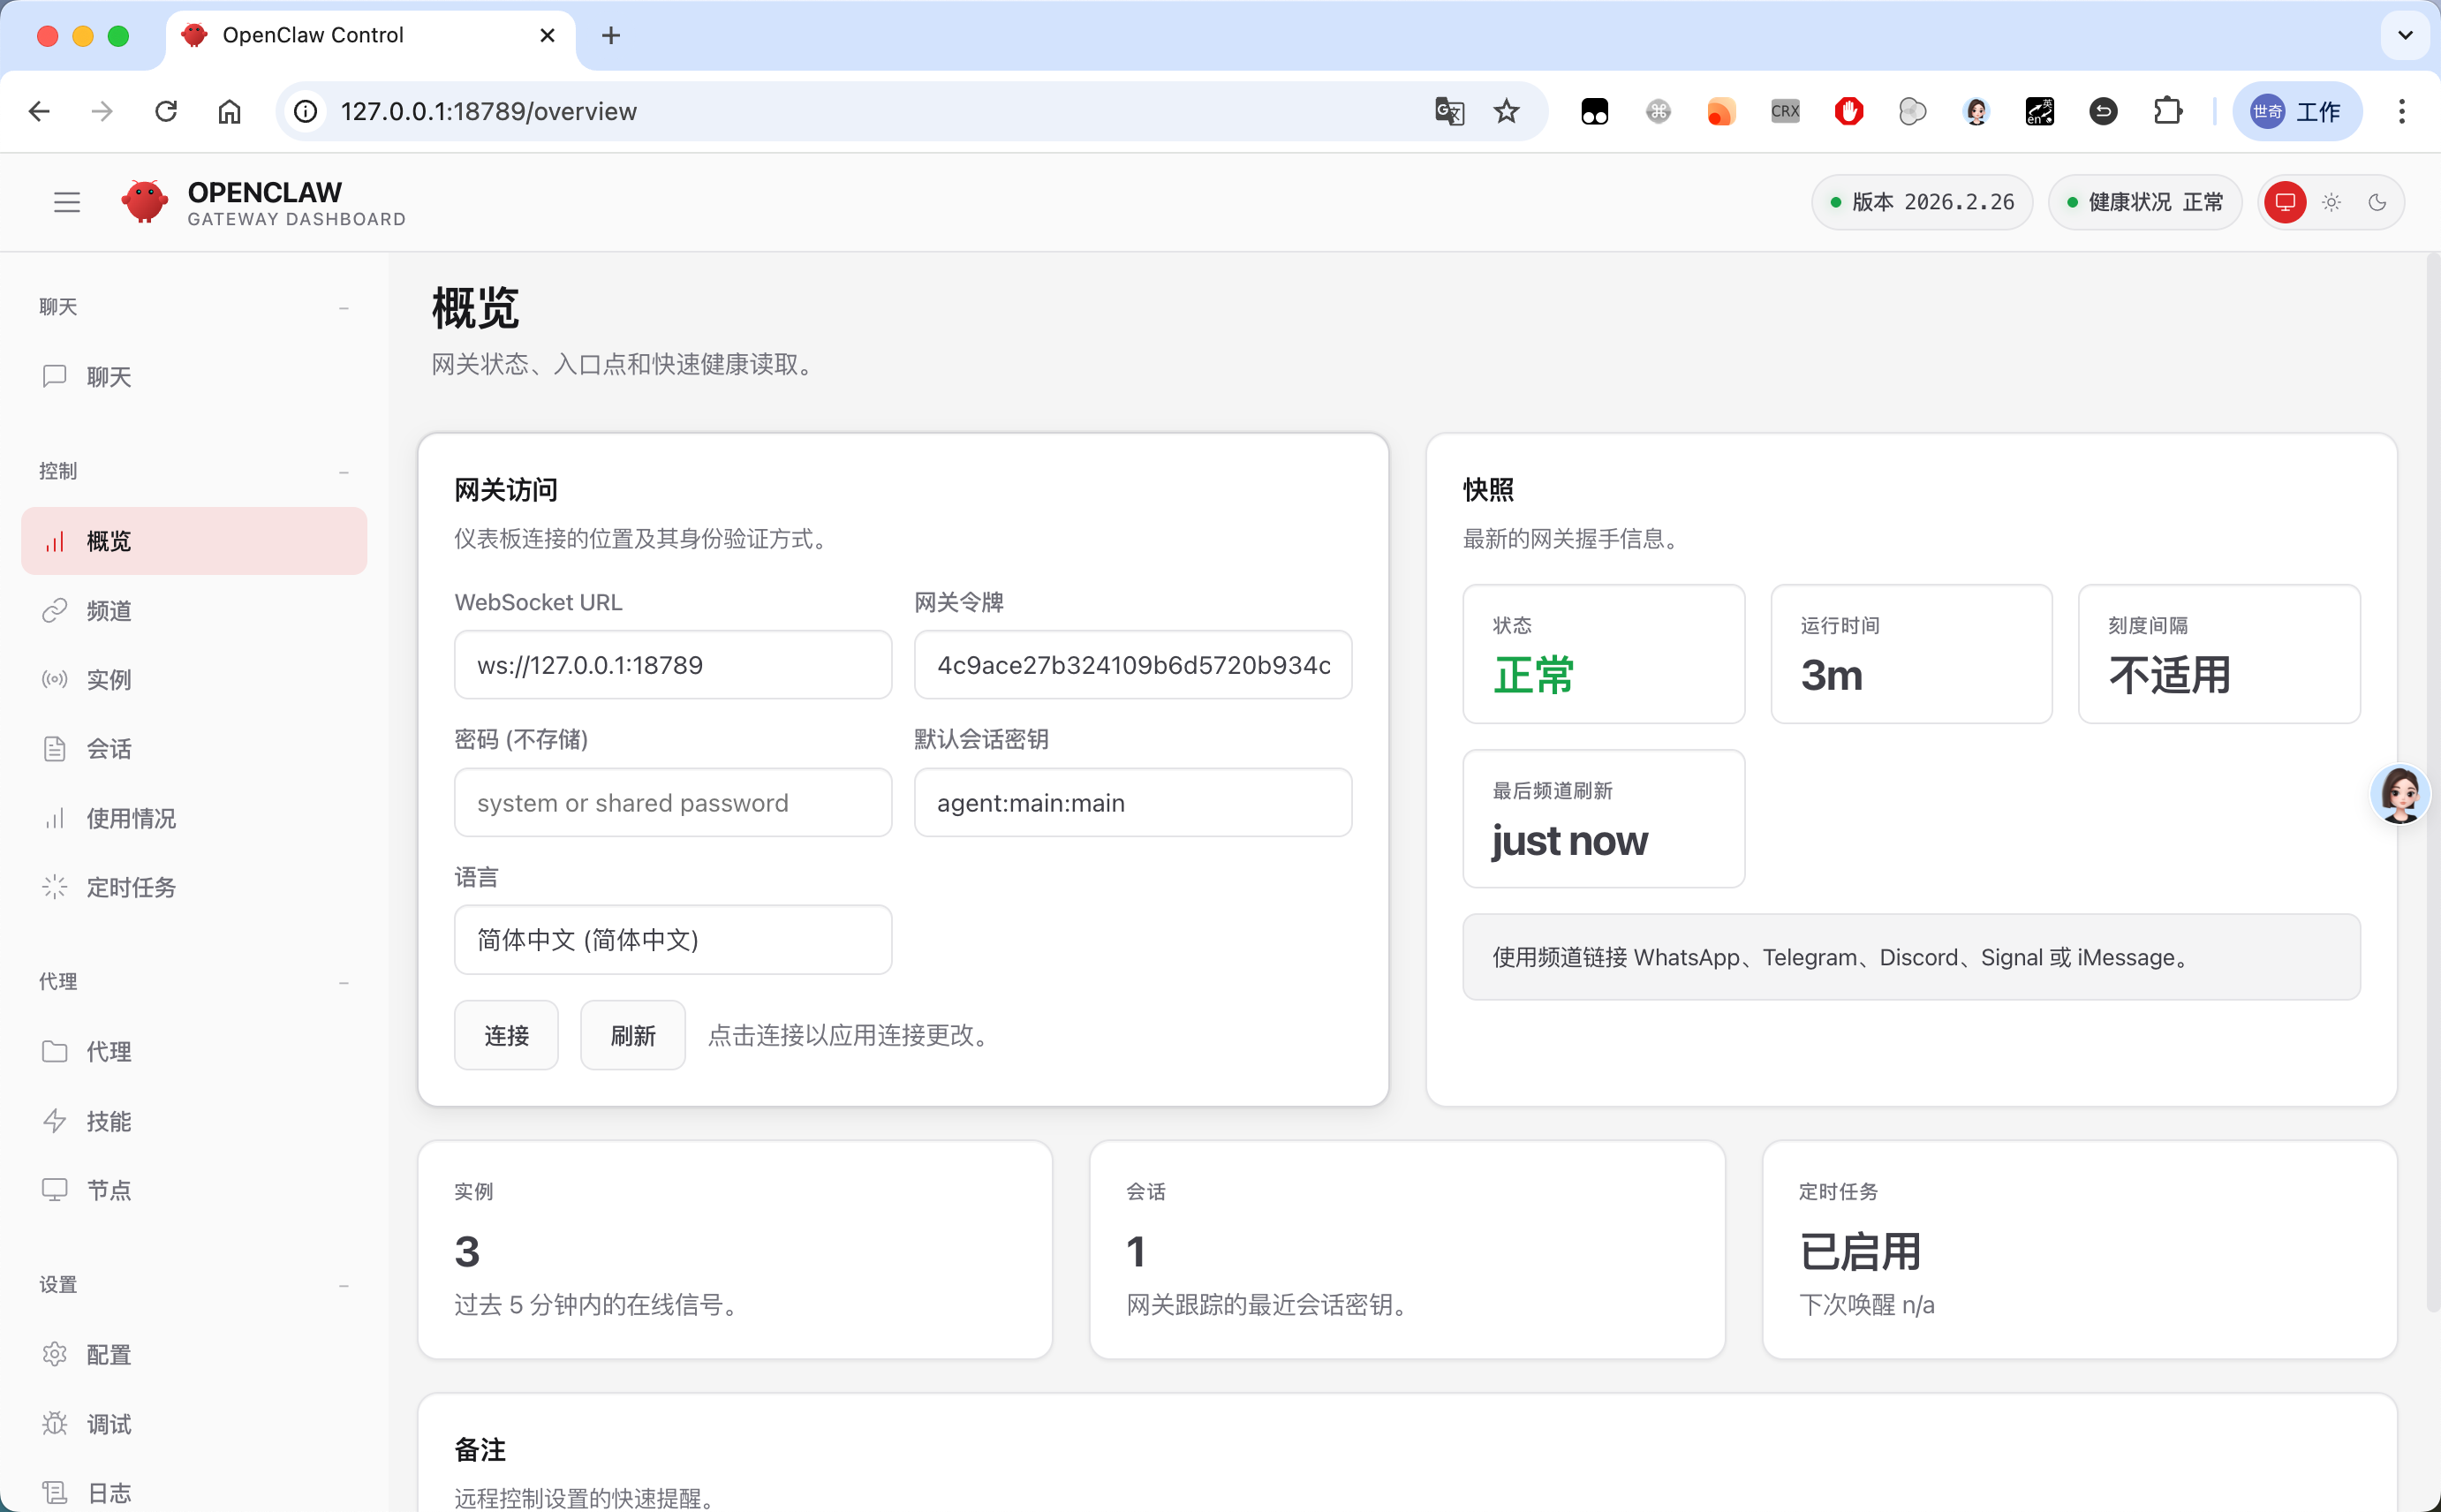
Open that URL in a browser. If the OpenClaw console UI loads correctly, the install was successful:
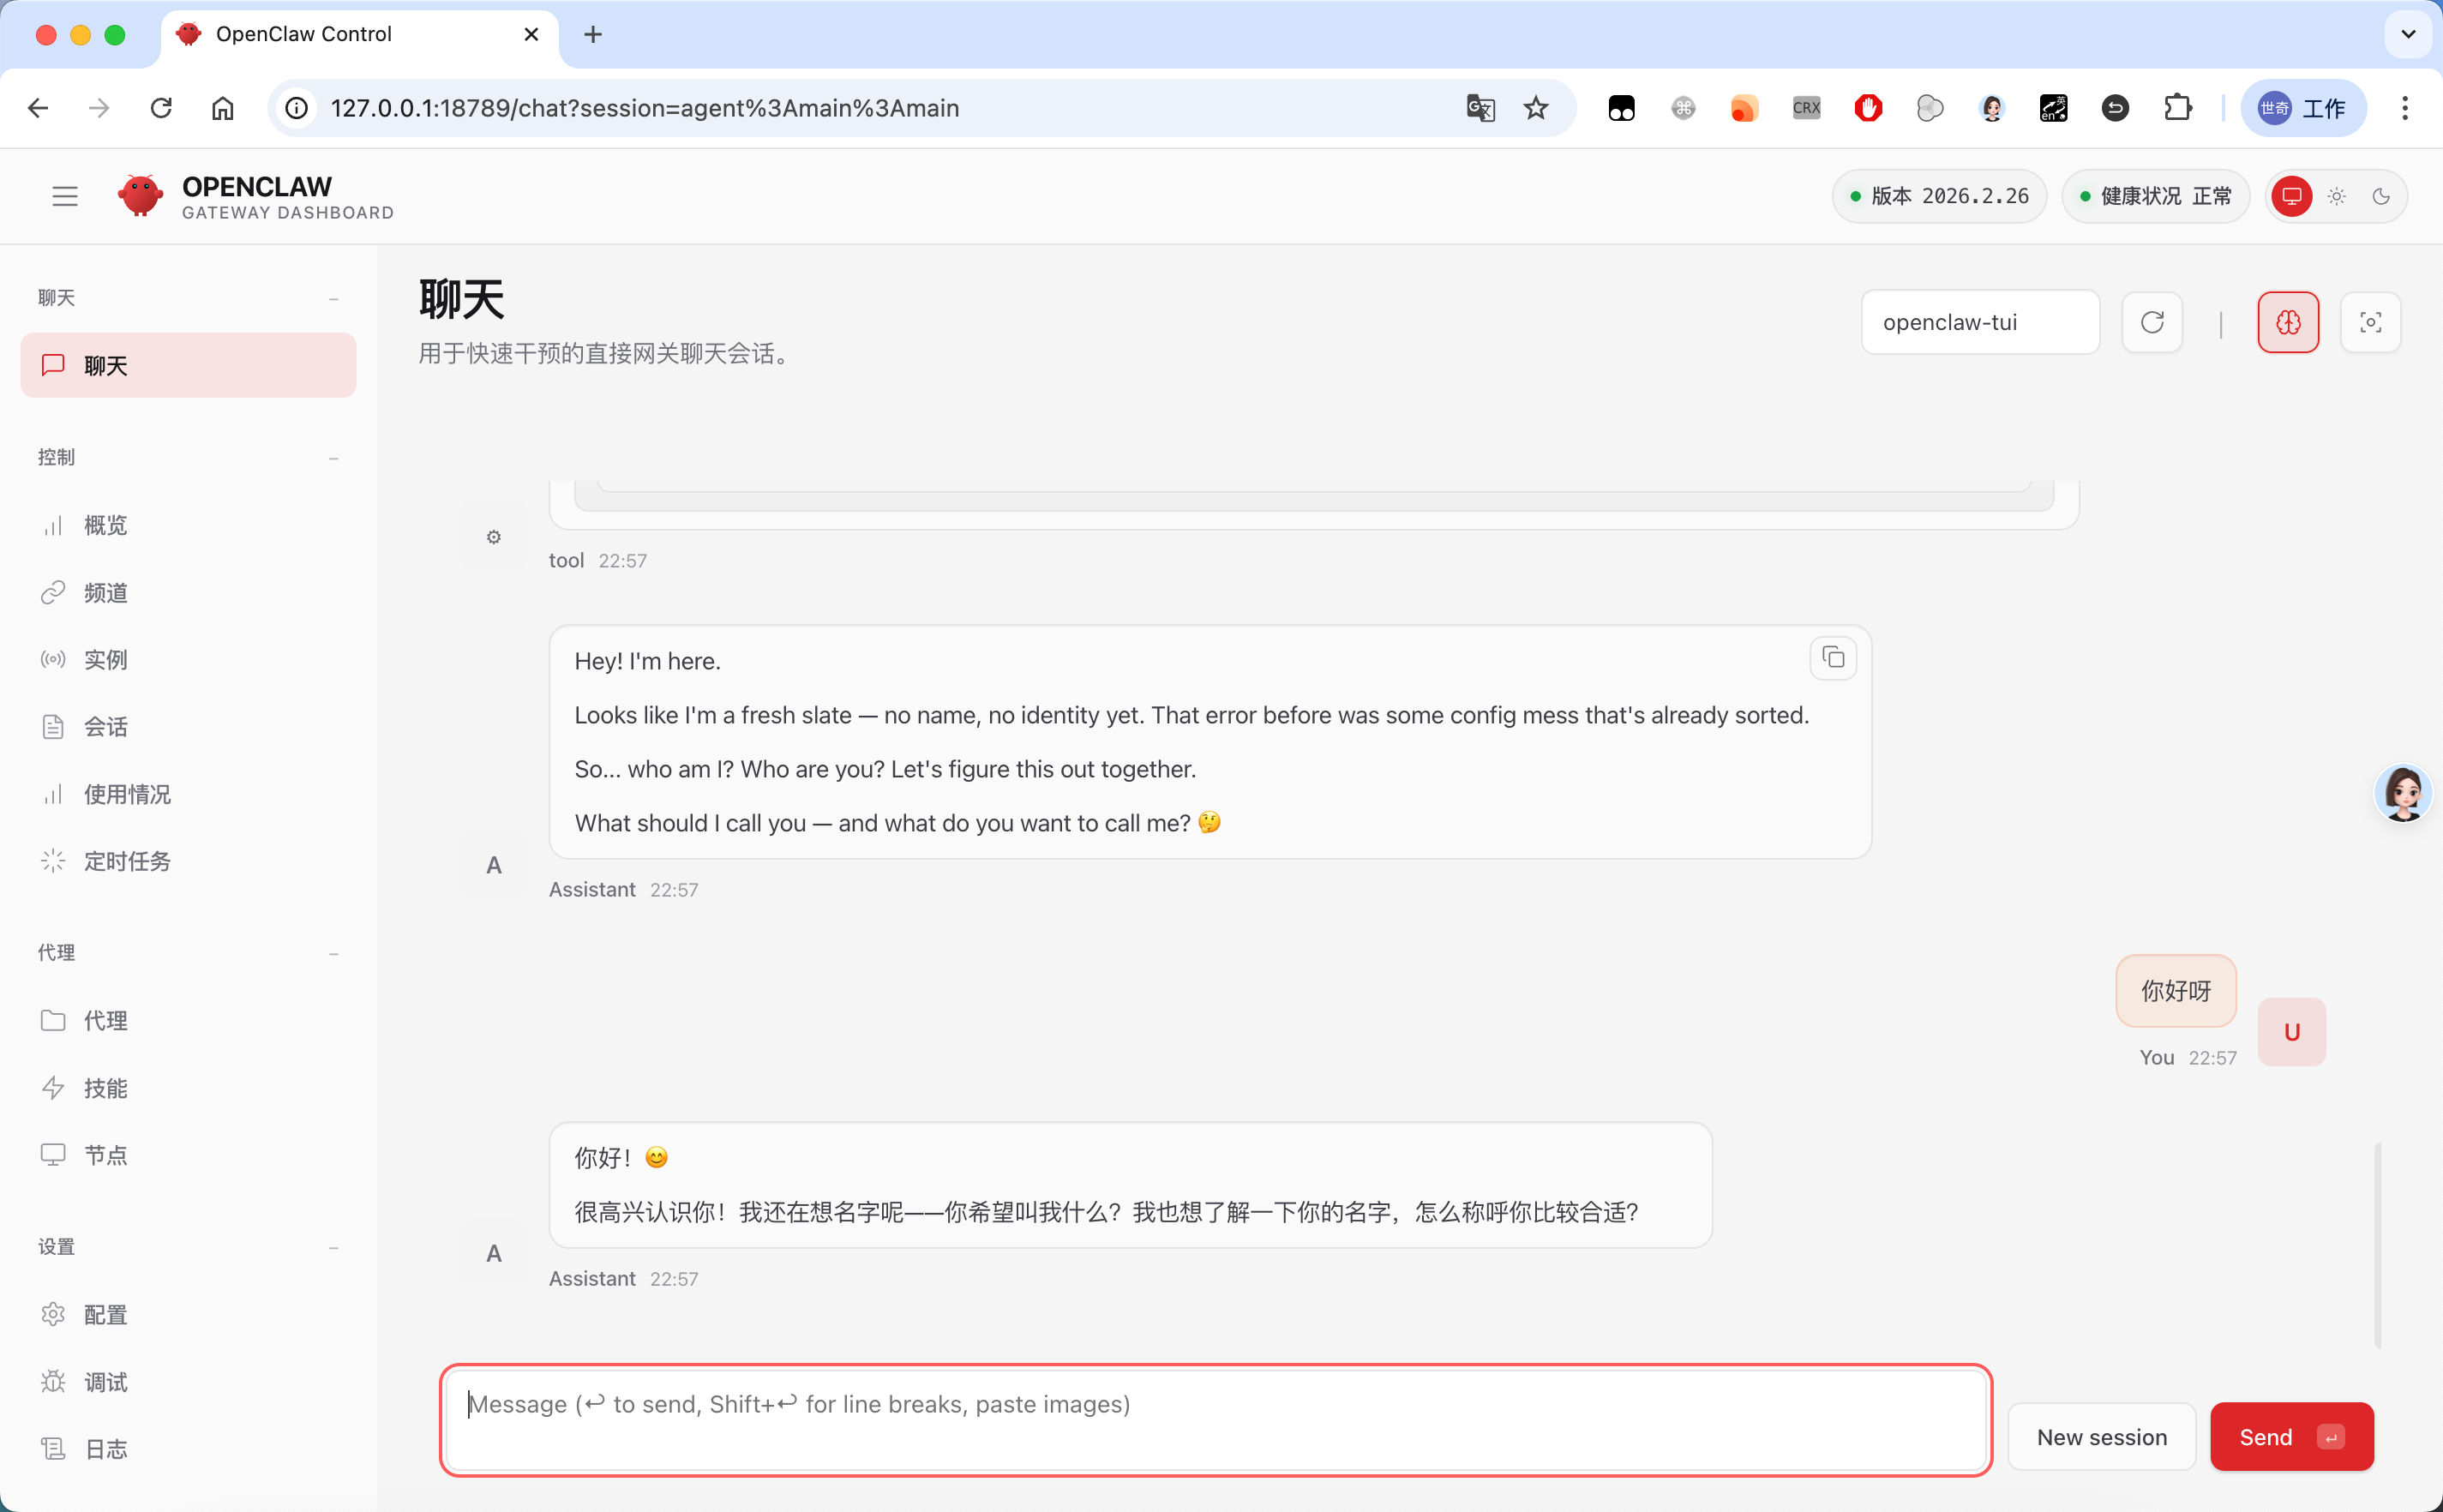
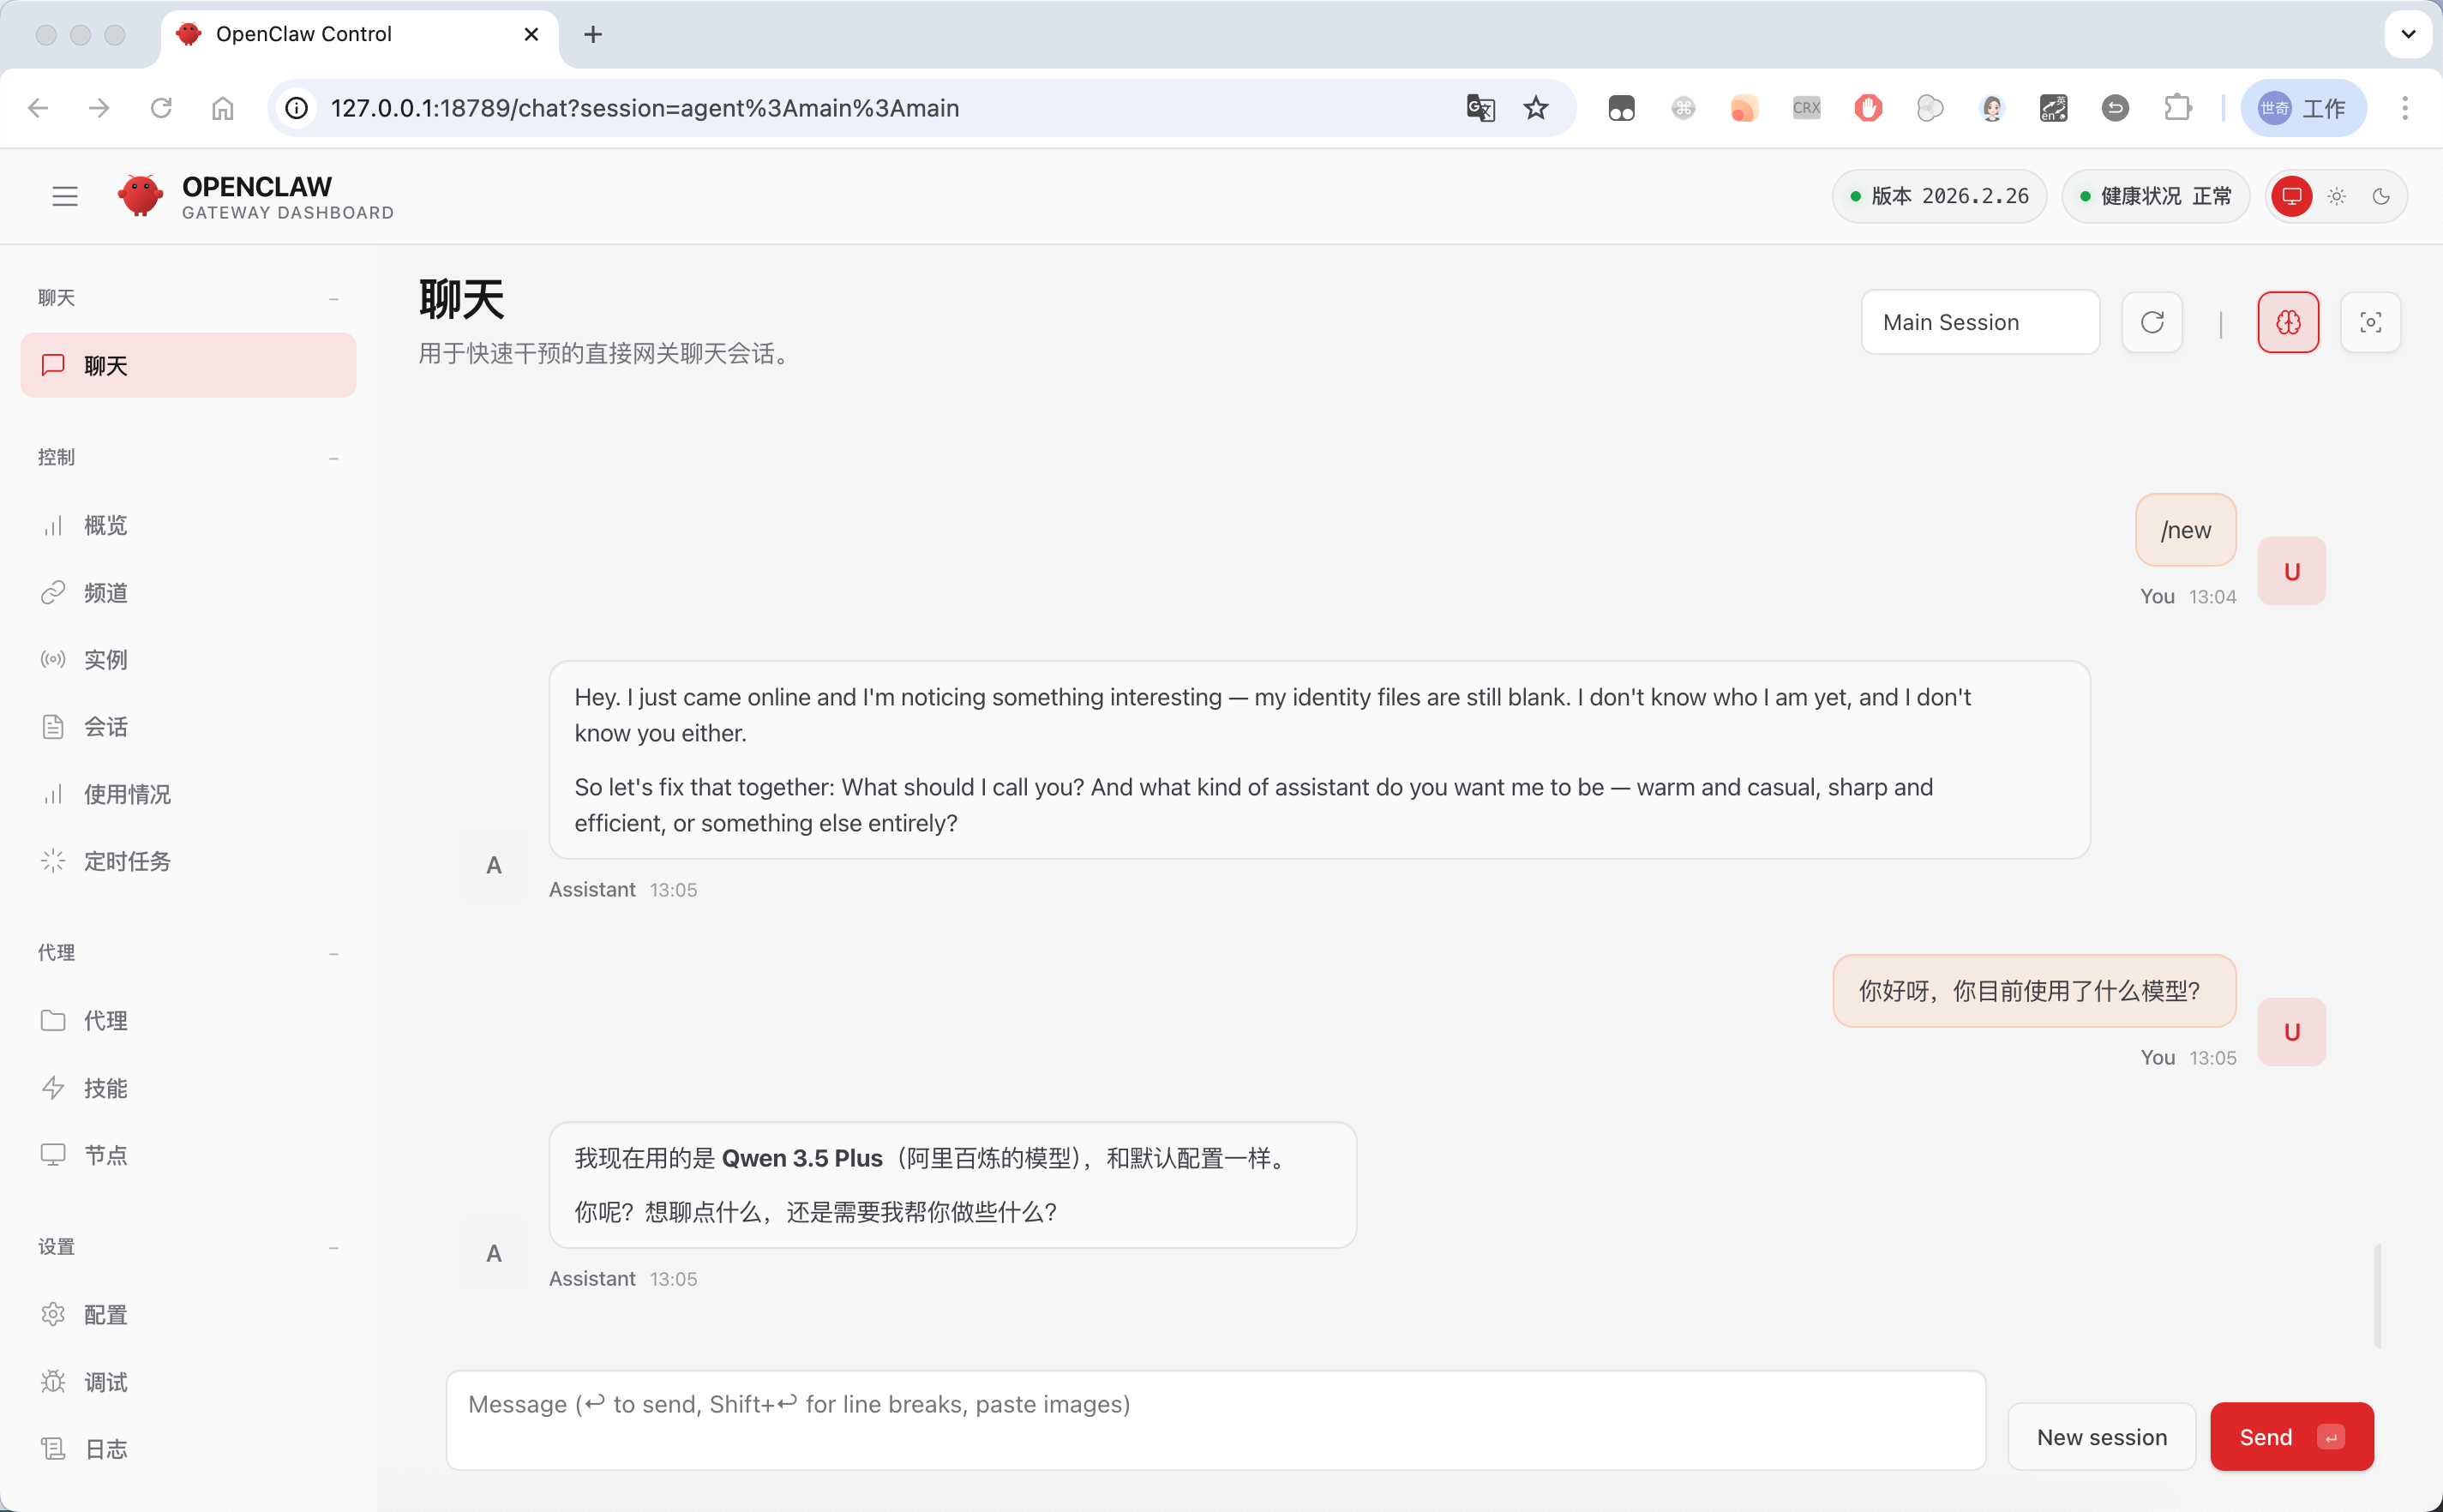
If you already configured a model API Key during the wizard, you can try chatting with it now:
Connect Any Large Model to OpenClaw
In this chapter you'll learn how to configure custom large-model APIs in OpenClaw.
If you skipped model configuration in the onboarding wizard, or you want to add more custom models, head into the configuration module on the control panel.
The default form-based view is currently a poor experience — we recommend switching directly into Raw mode for editing:
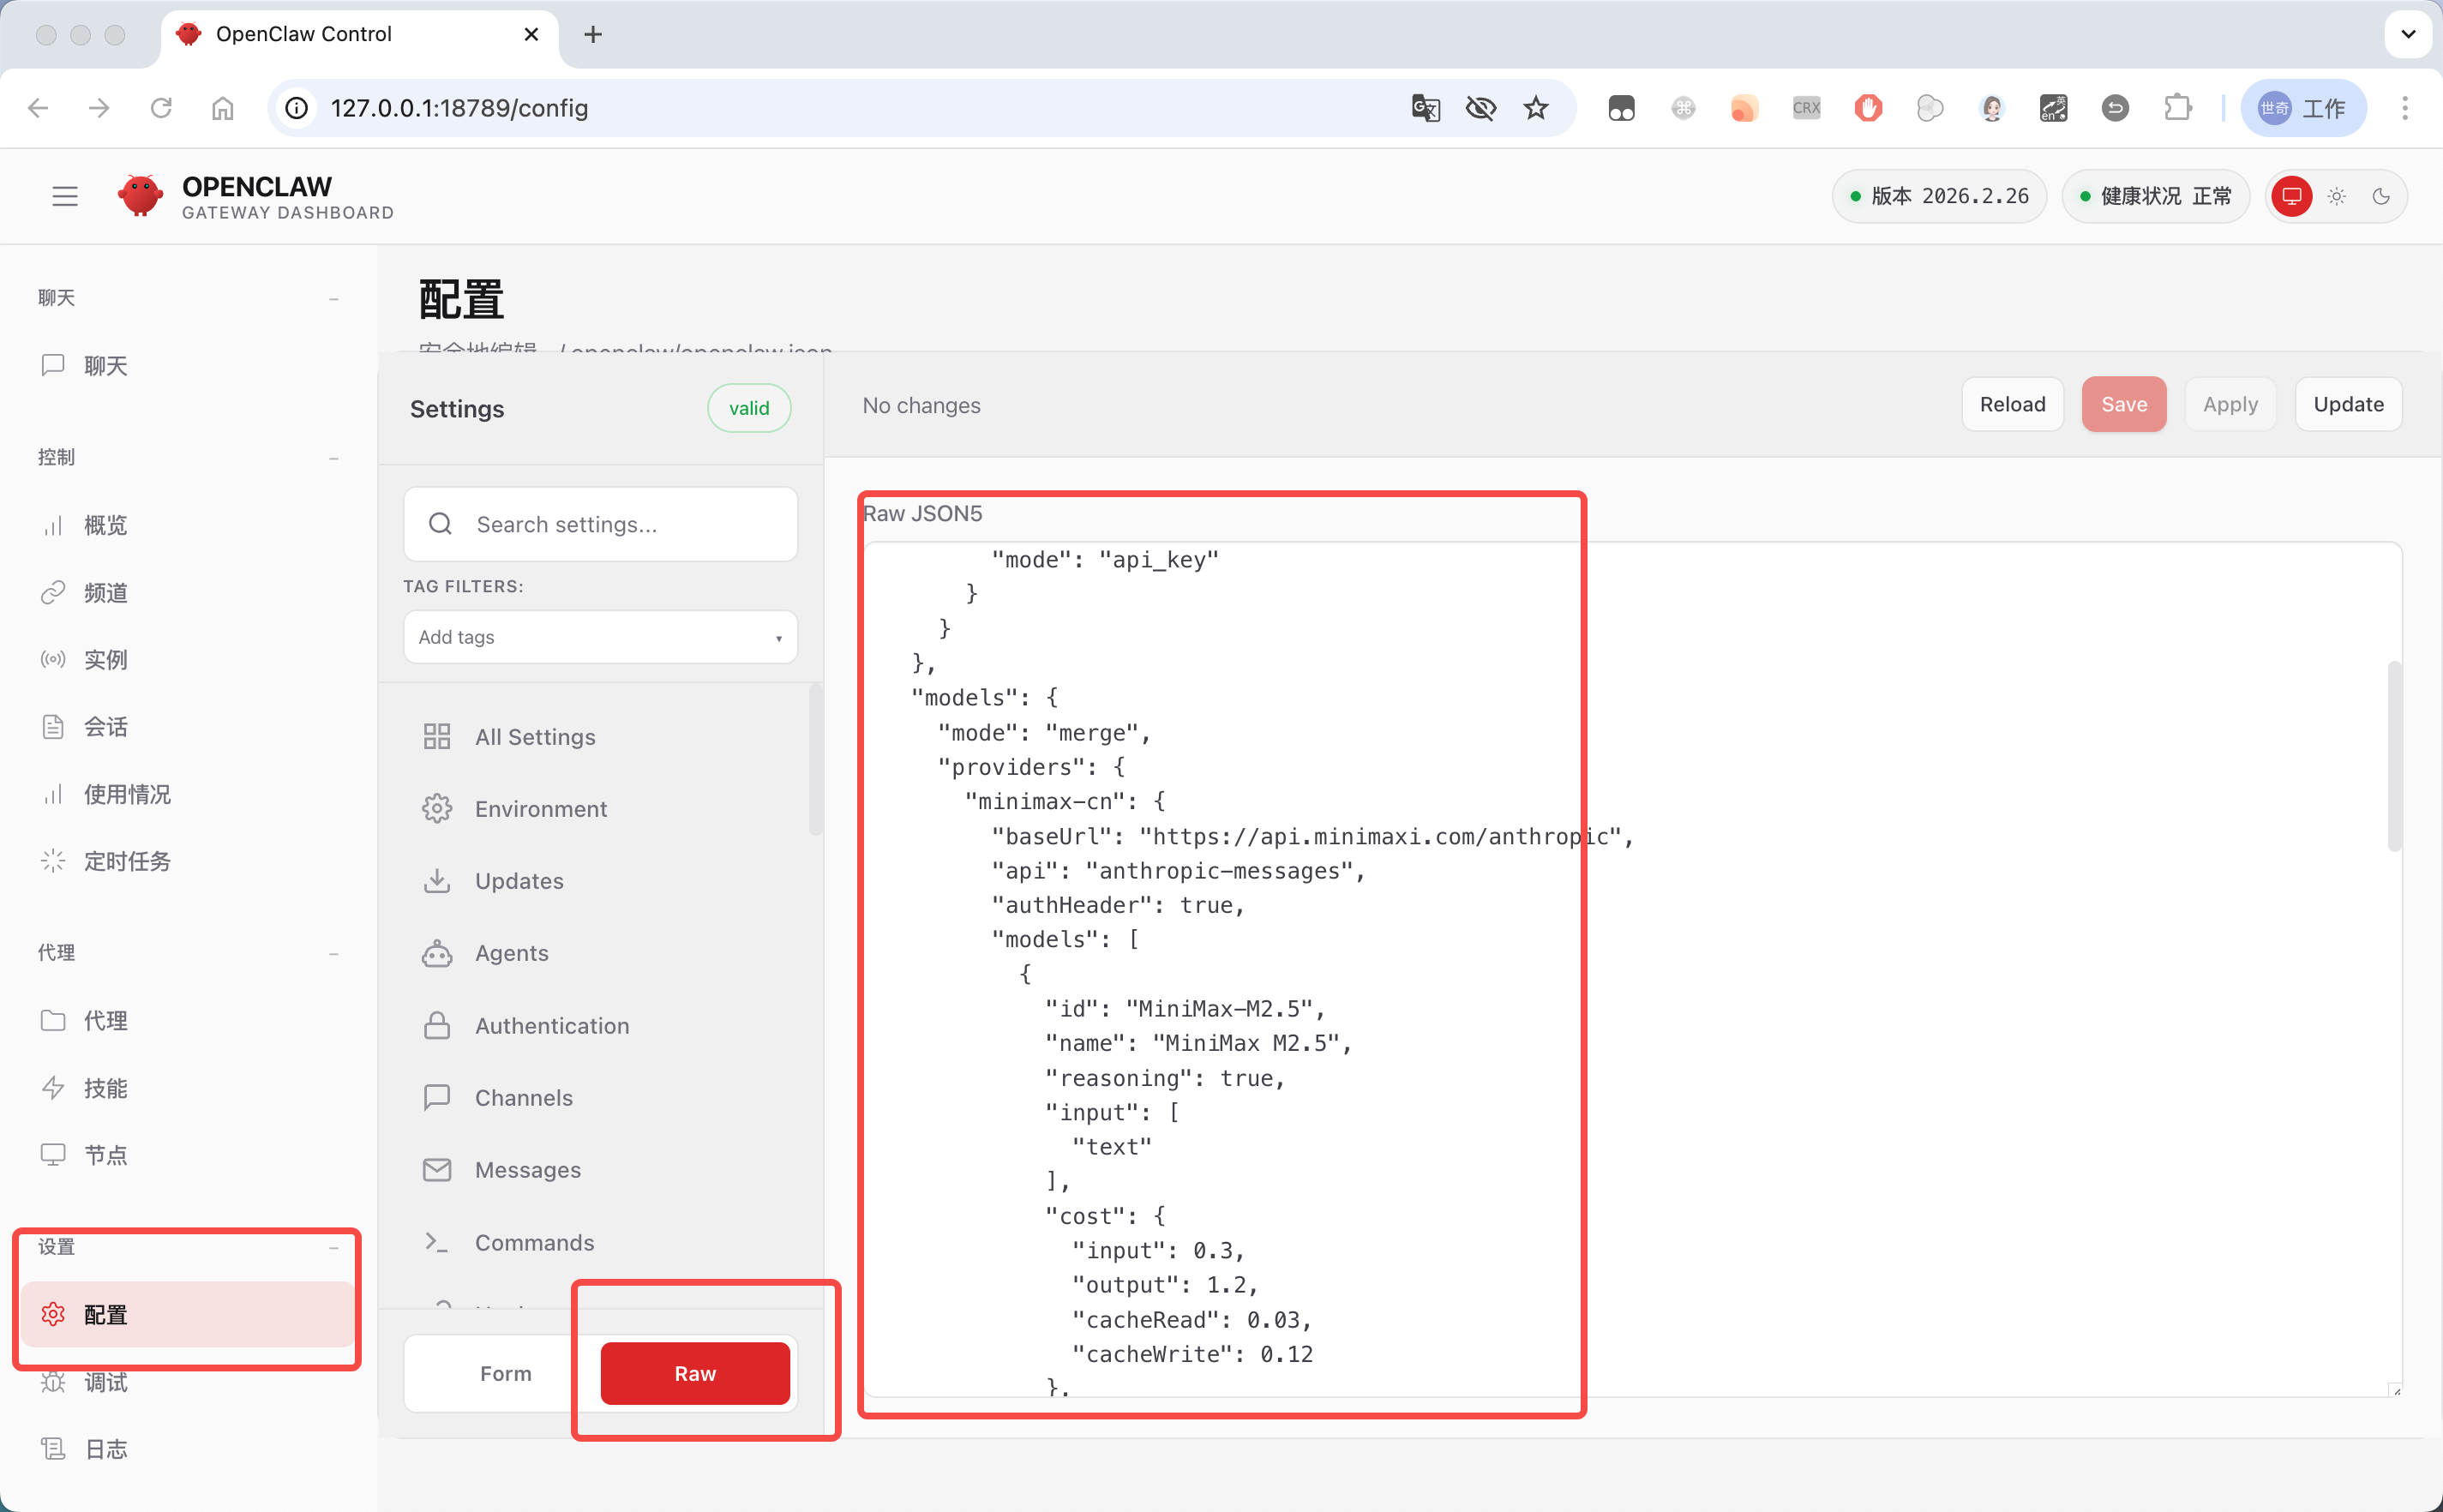
This JSON is actually OpenClaw's core configuration file, stored at ~/.openclaw/openclaw.json.Reading the Model Config
OpenClaw's built-in config module doesn't format or syntax-highlight JSON, so editing in it is painful. We recommend opening the file directly in an editor like VS Code:
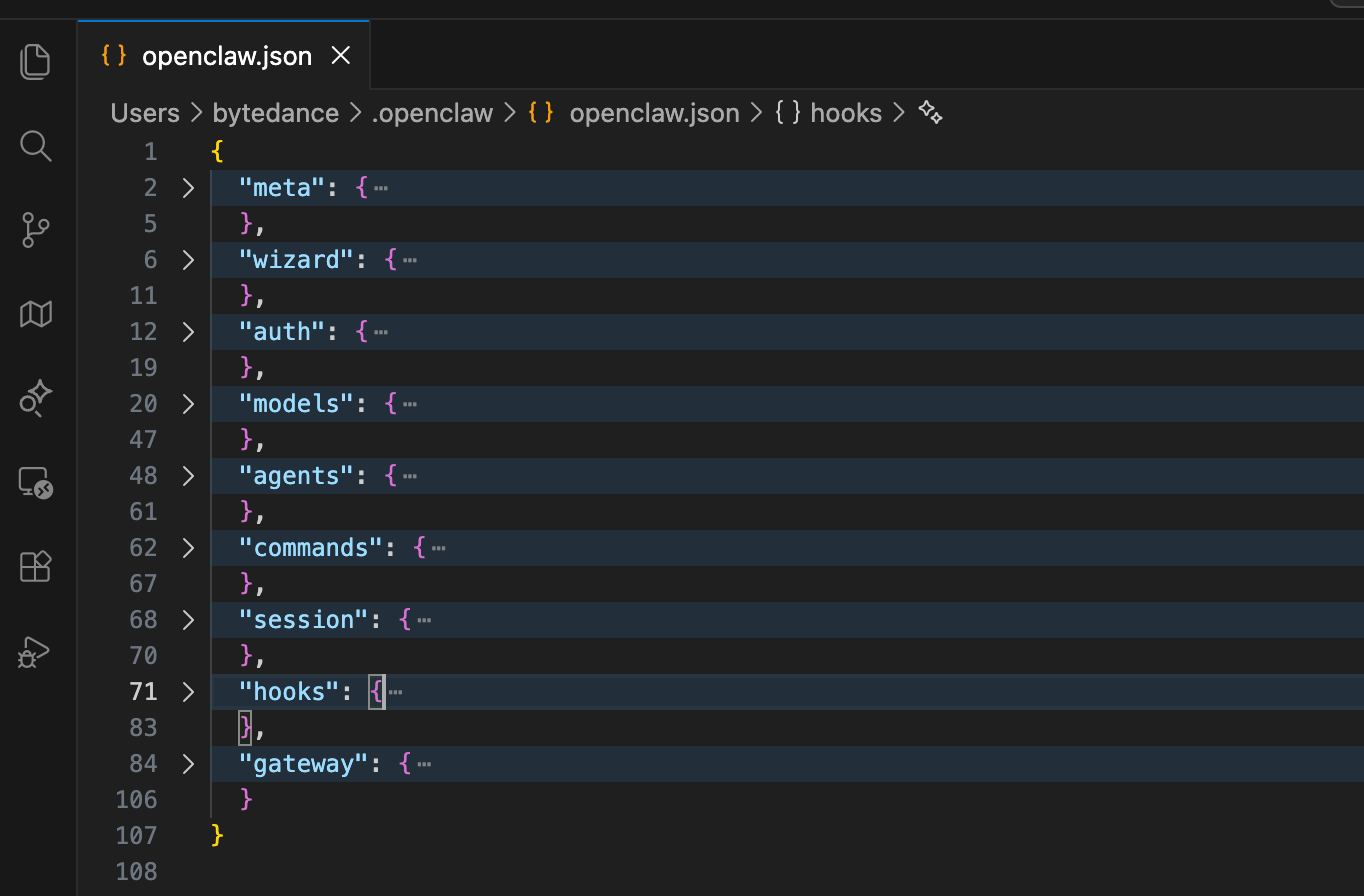
There's a lot in the default config — collapse the top-level keys and you'll see these categories:
- meta: metadata, holds basic info about the configuration file
- wizard: wizard configuration, records runs of the interactive setup wizard
- auth: authentication, manages credentials for model providers
- models: model providers and their model metadata
- agents: default Agent behavior
- commands: command execution rules — controls how OpenClaw runs commands
- session: session management — defines session scopes and lifecycle
- hooks: hooks configuration — manages built-in event hooks and plugins
- gateway: gateway configuration — controls OpenClaw's network service (port, auth, access control, etc.)
For model setup we use the models and agents blocks. Expanded, they look like this — since we configured MiniMax in the wizard earlier, there's already a default config in place:
{
  "models": {
    "mode": "merge",
    "providers": {
      "minimax-cn": {
        "baseUrl": "https://api.minimaxi.com/anthropic",
        "api": "anthropic-messages",
        "models": [
          {
            "id": "MiniMax-M2.5",
            "name": "MiniMax M2.5",
            "reasoning": true,
            "input": [
              "text"
            ],
            "cost": {
              "input": 0.3,
              "output": 1.2,
              "cacheRead": 0.03,
              "cacheWrite": 0.12
            },
            "contextWindow": 200000,
            "maxTokens": 8192
          }
        ]
      }
    }
  },
  "agents": {
    "defaults": {
      "model": {
        "primary": "minimax-cn/MiniMax-M2.5"
      },
      "models": {
        "minimax-cn/MiniMax-M2.5": {
          "alias": "Minimax"
        }
      }
    }
  }
- Top-level field
models: model providers and model metadata
This is the core config OpenClaw uses to recognize a custom model provider. It tells the system where to call the model and what its parameters and pricing rules are.
- Top-level field
agents: default Agent behavior
This defines the default rules for OpenClaw Agents — which model to use by default, which models are allowed (the whitelist), and the model's short alias.
Custom Model Configuration
Following this format, you can add more model configurations. For example let's add an Alibaba Cloud Bailian model:
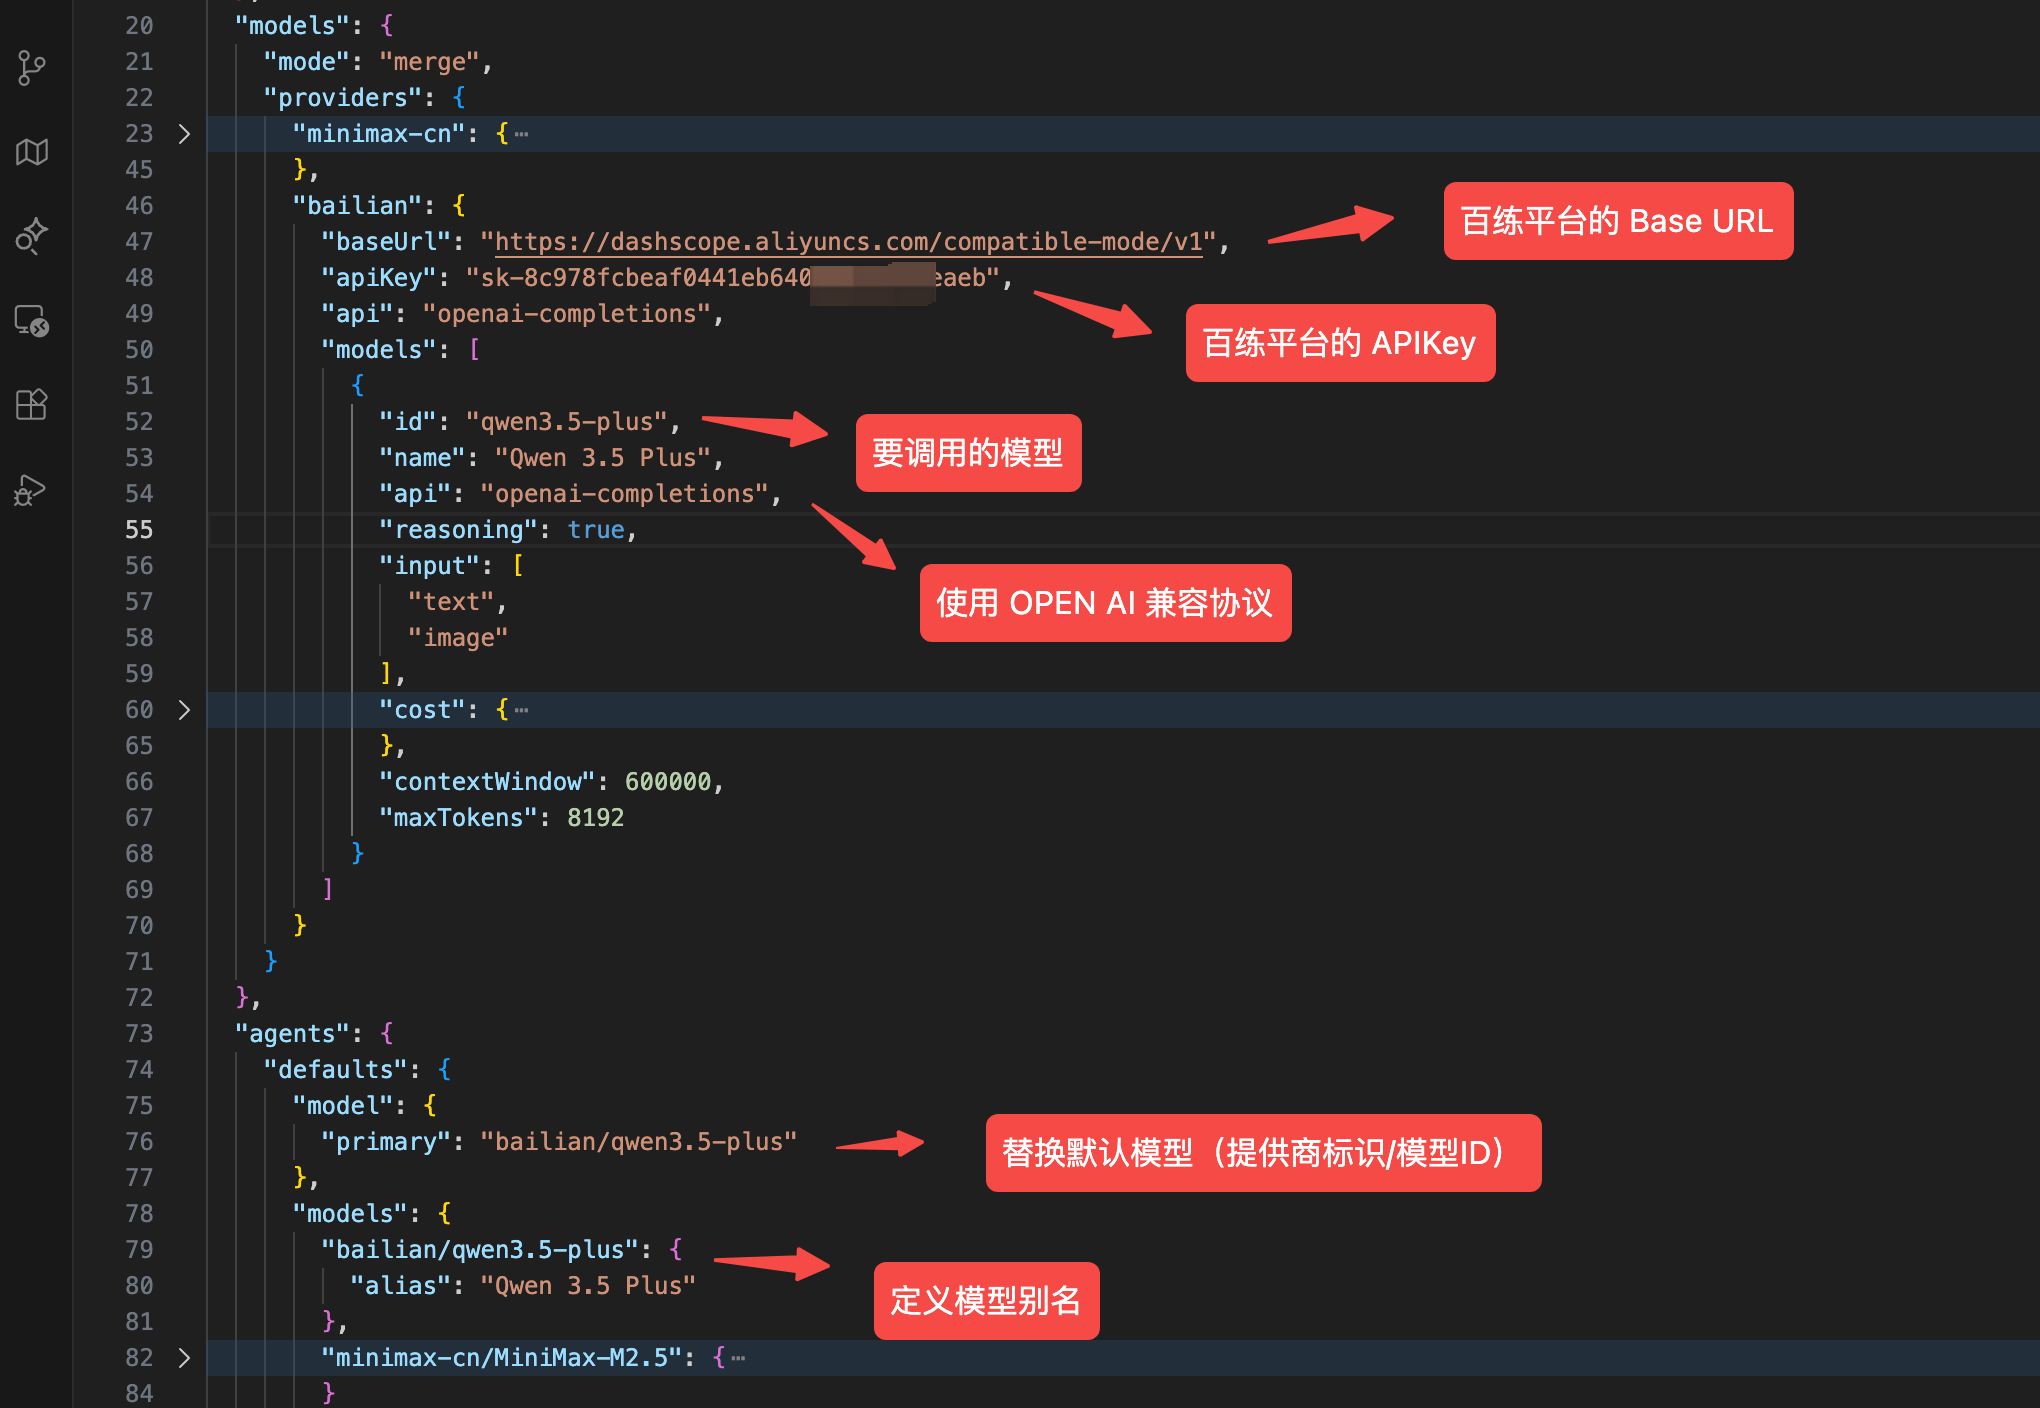
Add a new key under providers (we'll use bailian — pick whatever you like), then configure the model's baseUrl, apiKey, and model id, enable text and image input, turn on reasoning, and tune the context window and max output tokens.
Then under agents.defaults, add a config for the model you just added and switch the default model (model.primary) over to it.
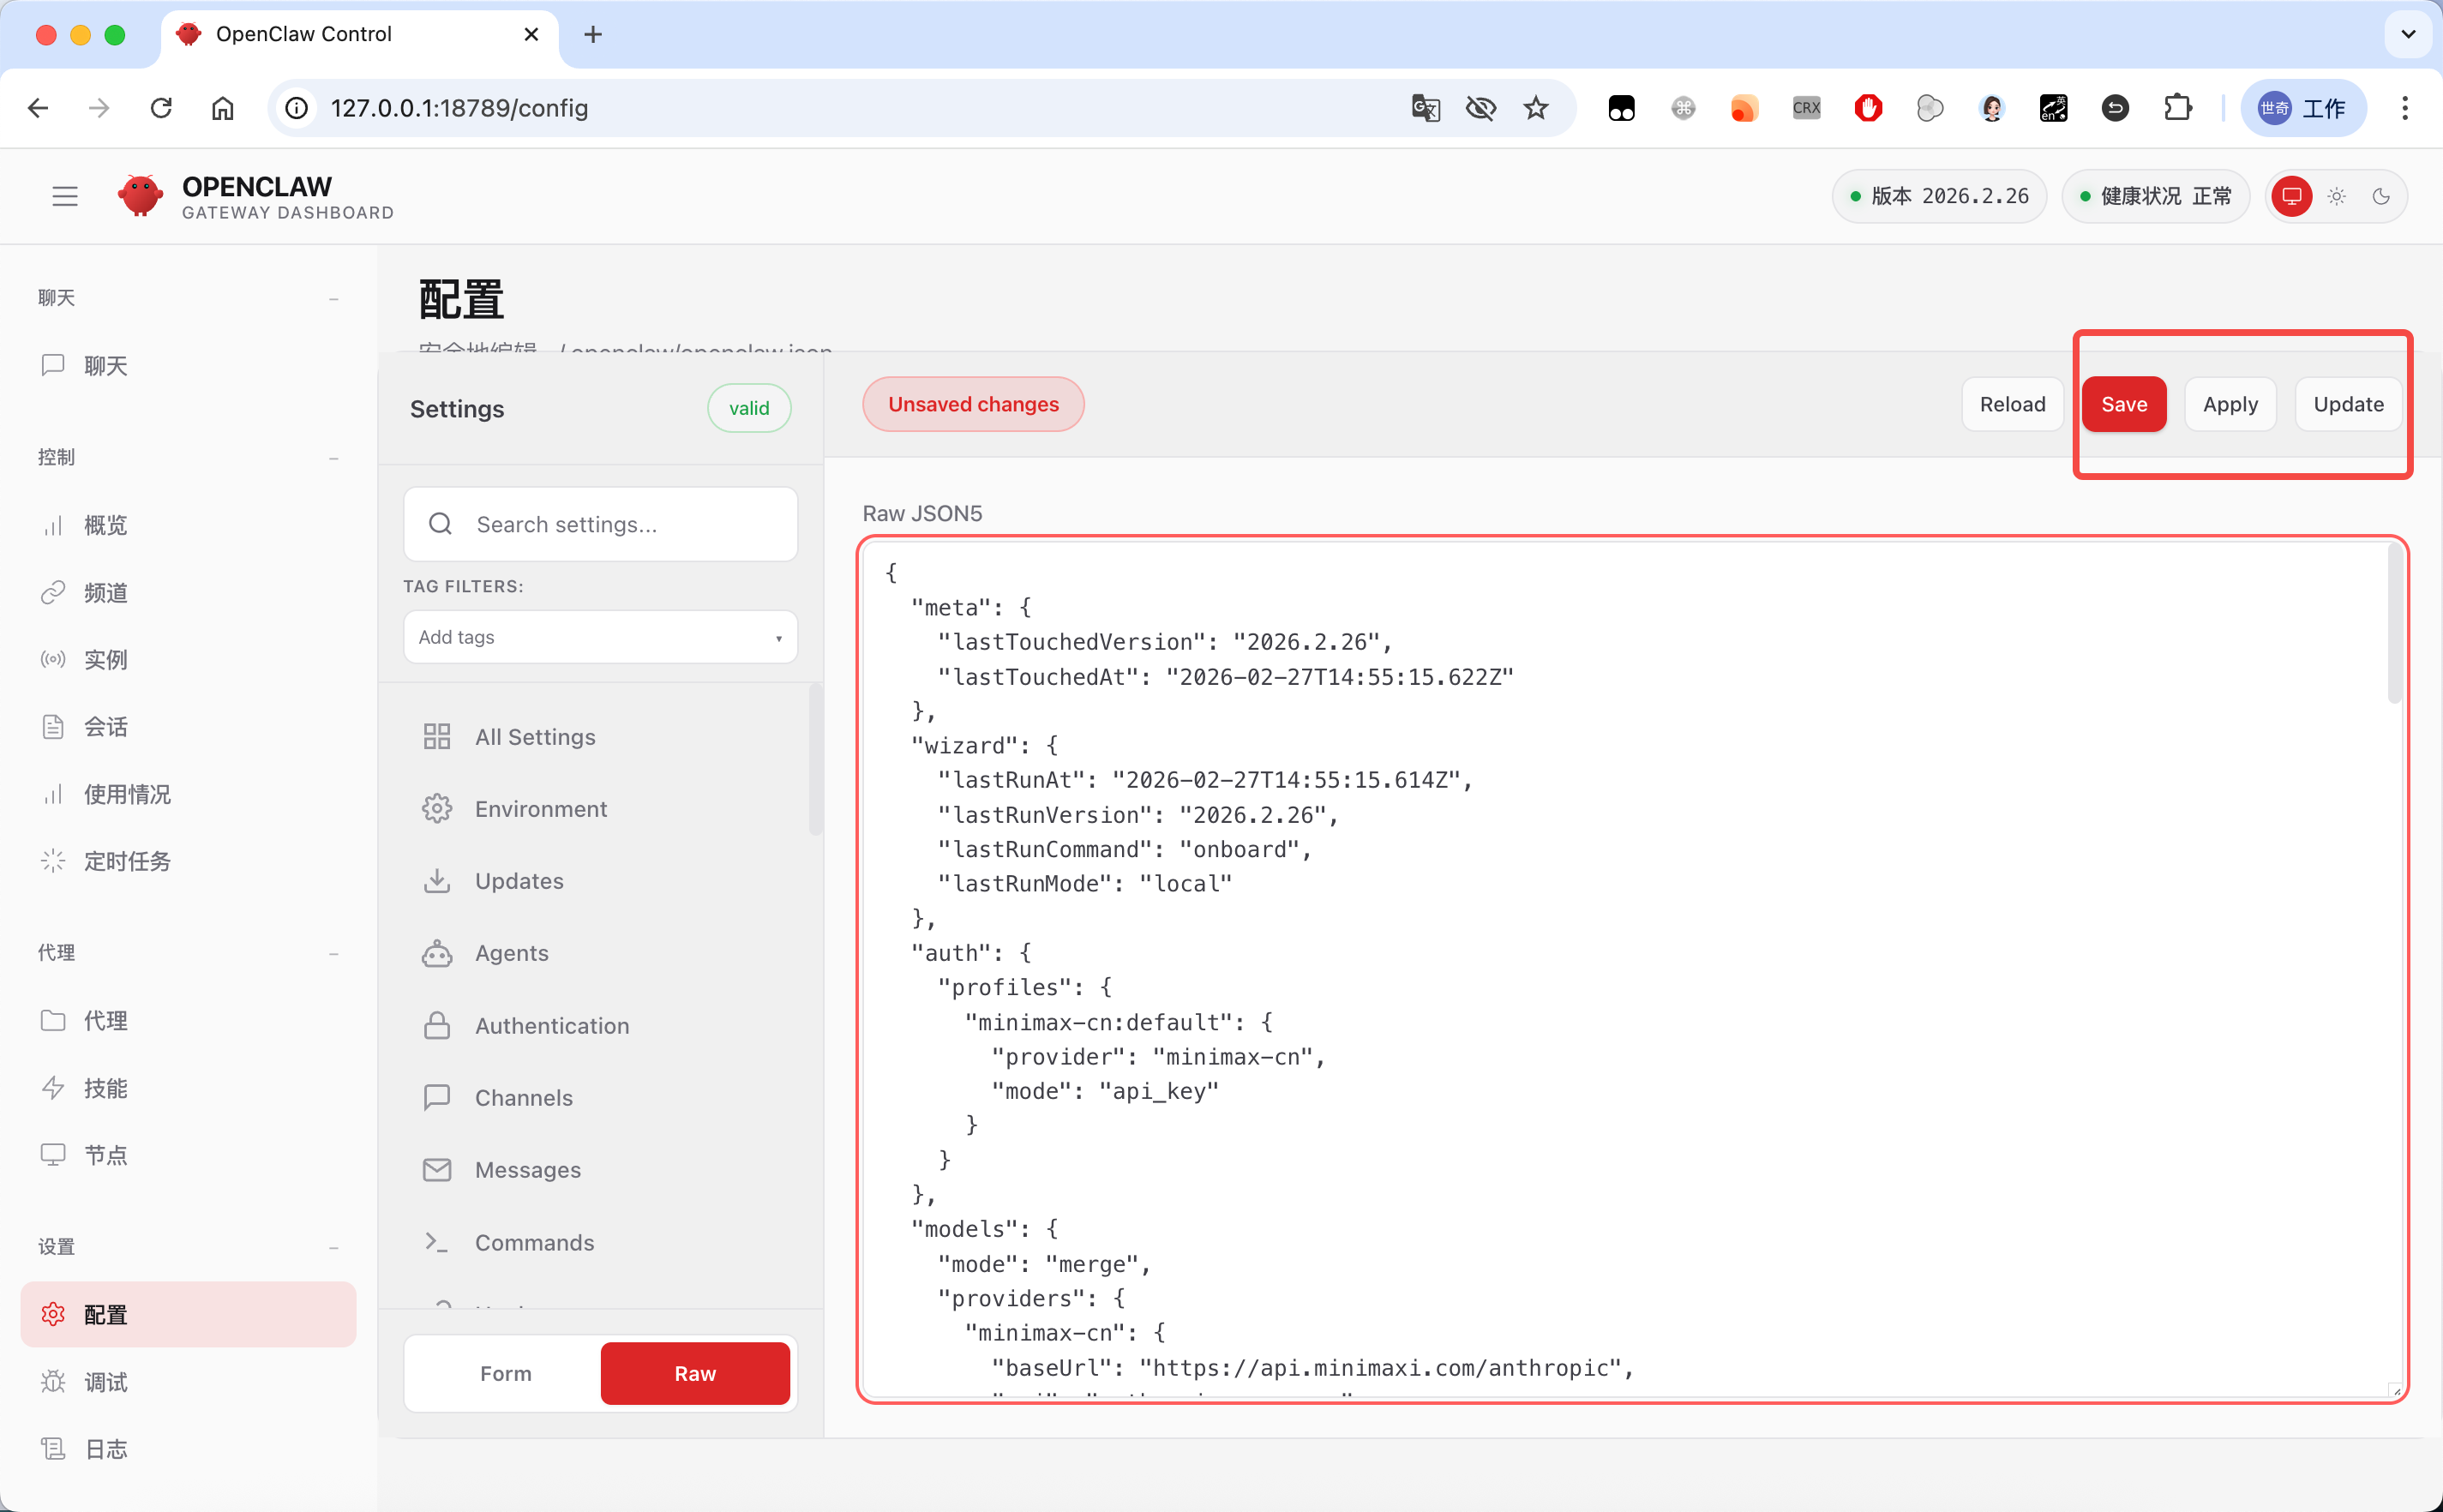
Paste the resulting config into Configuration → Raw JSONS in the control panel, click Save and Update, and OpenClaw will apply the change and restart the service (give it a moment).
Now let's test it in the chat:
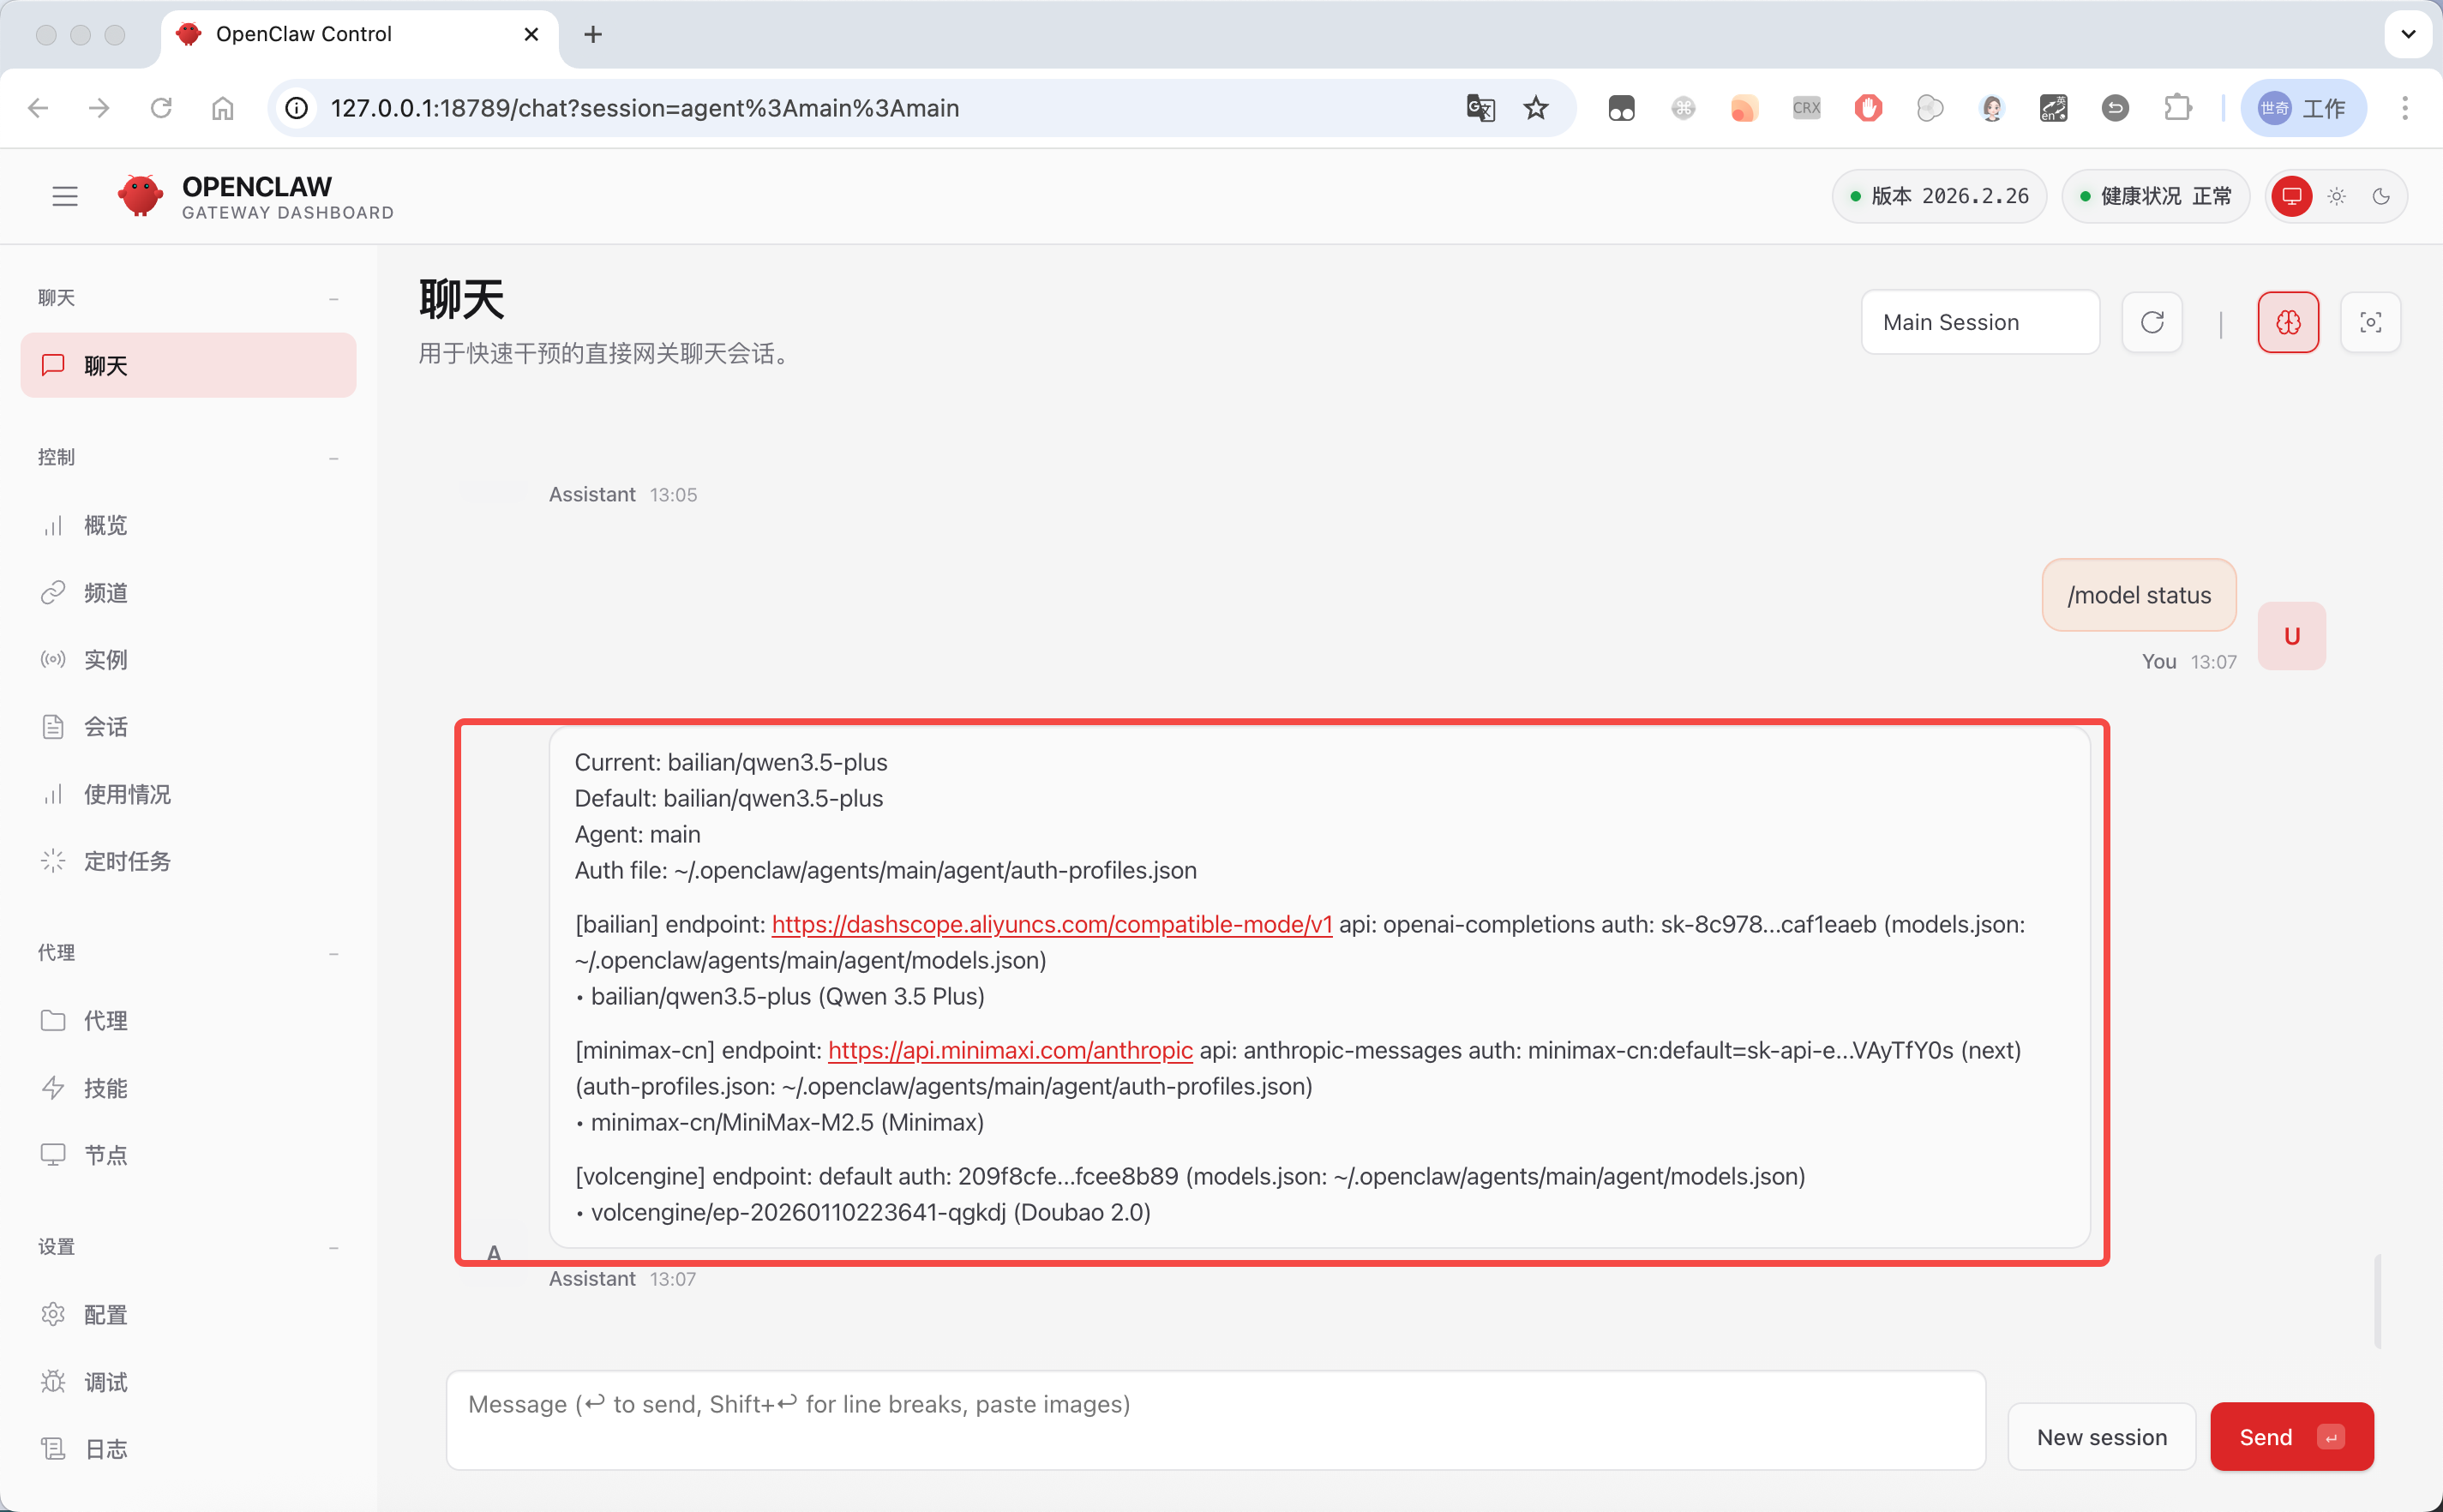
Type /model status in the chat box to see all currently configured models:
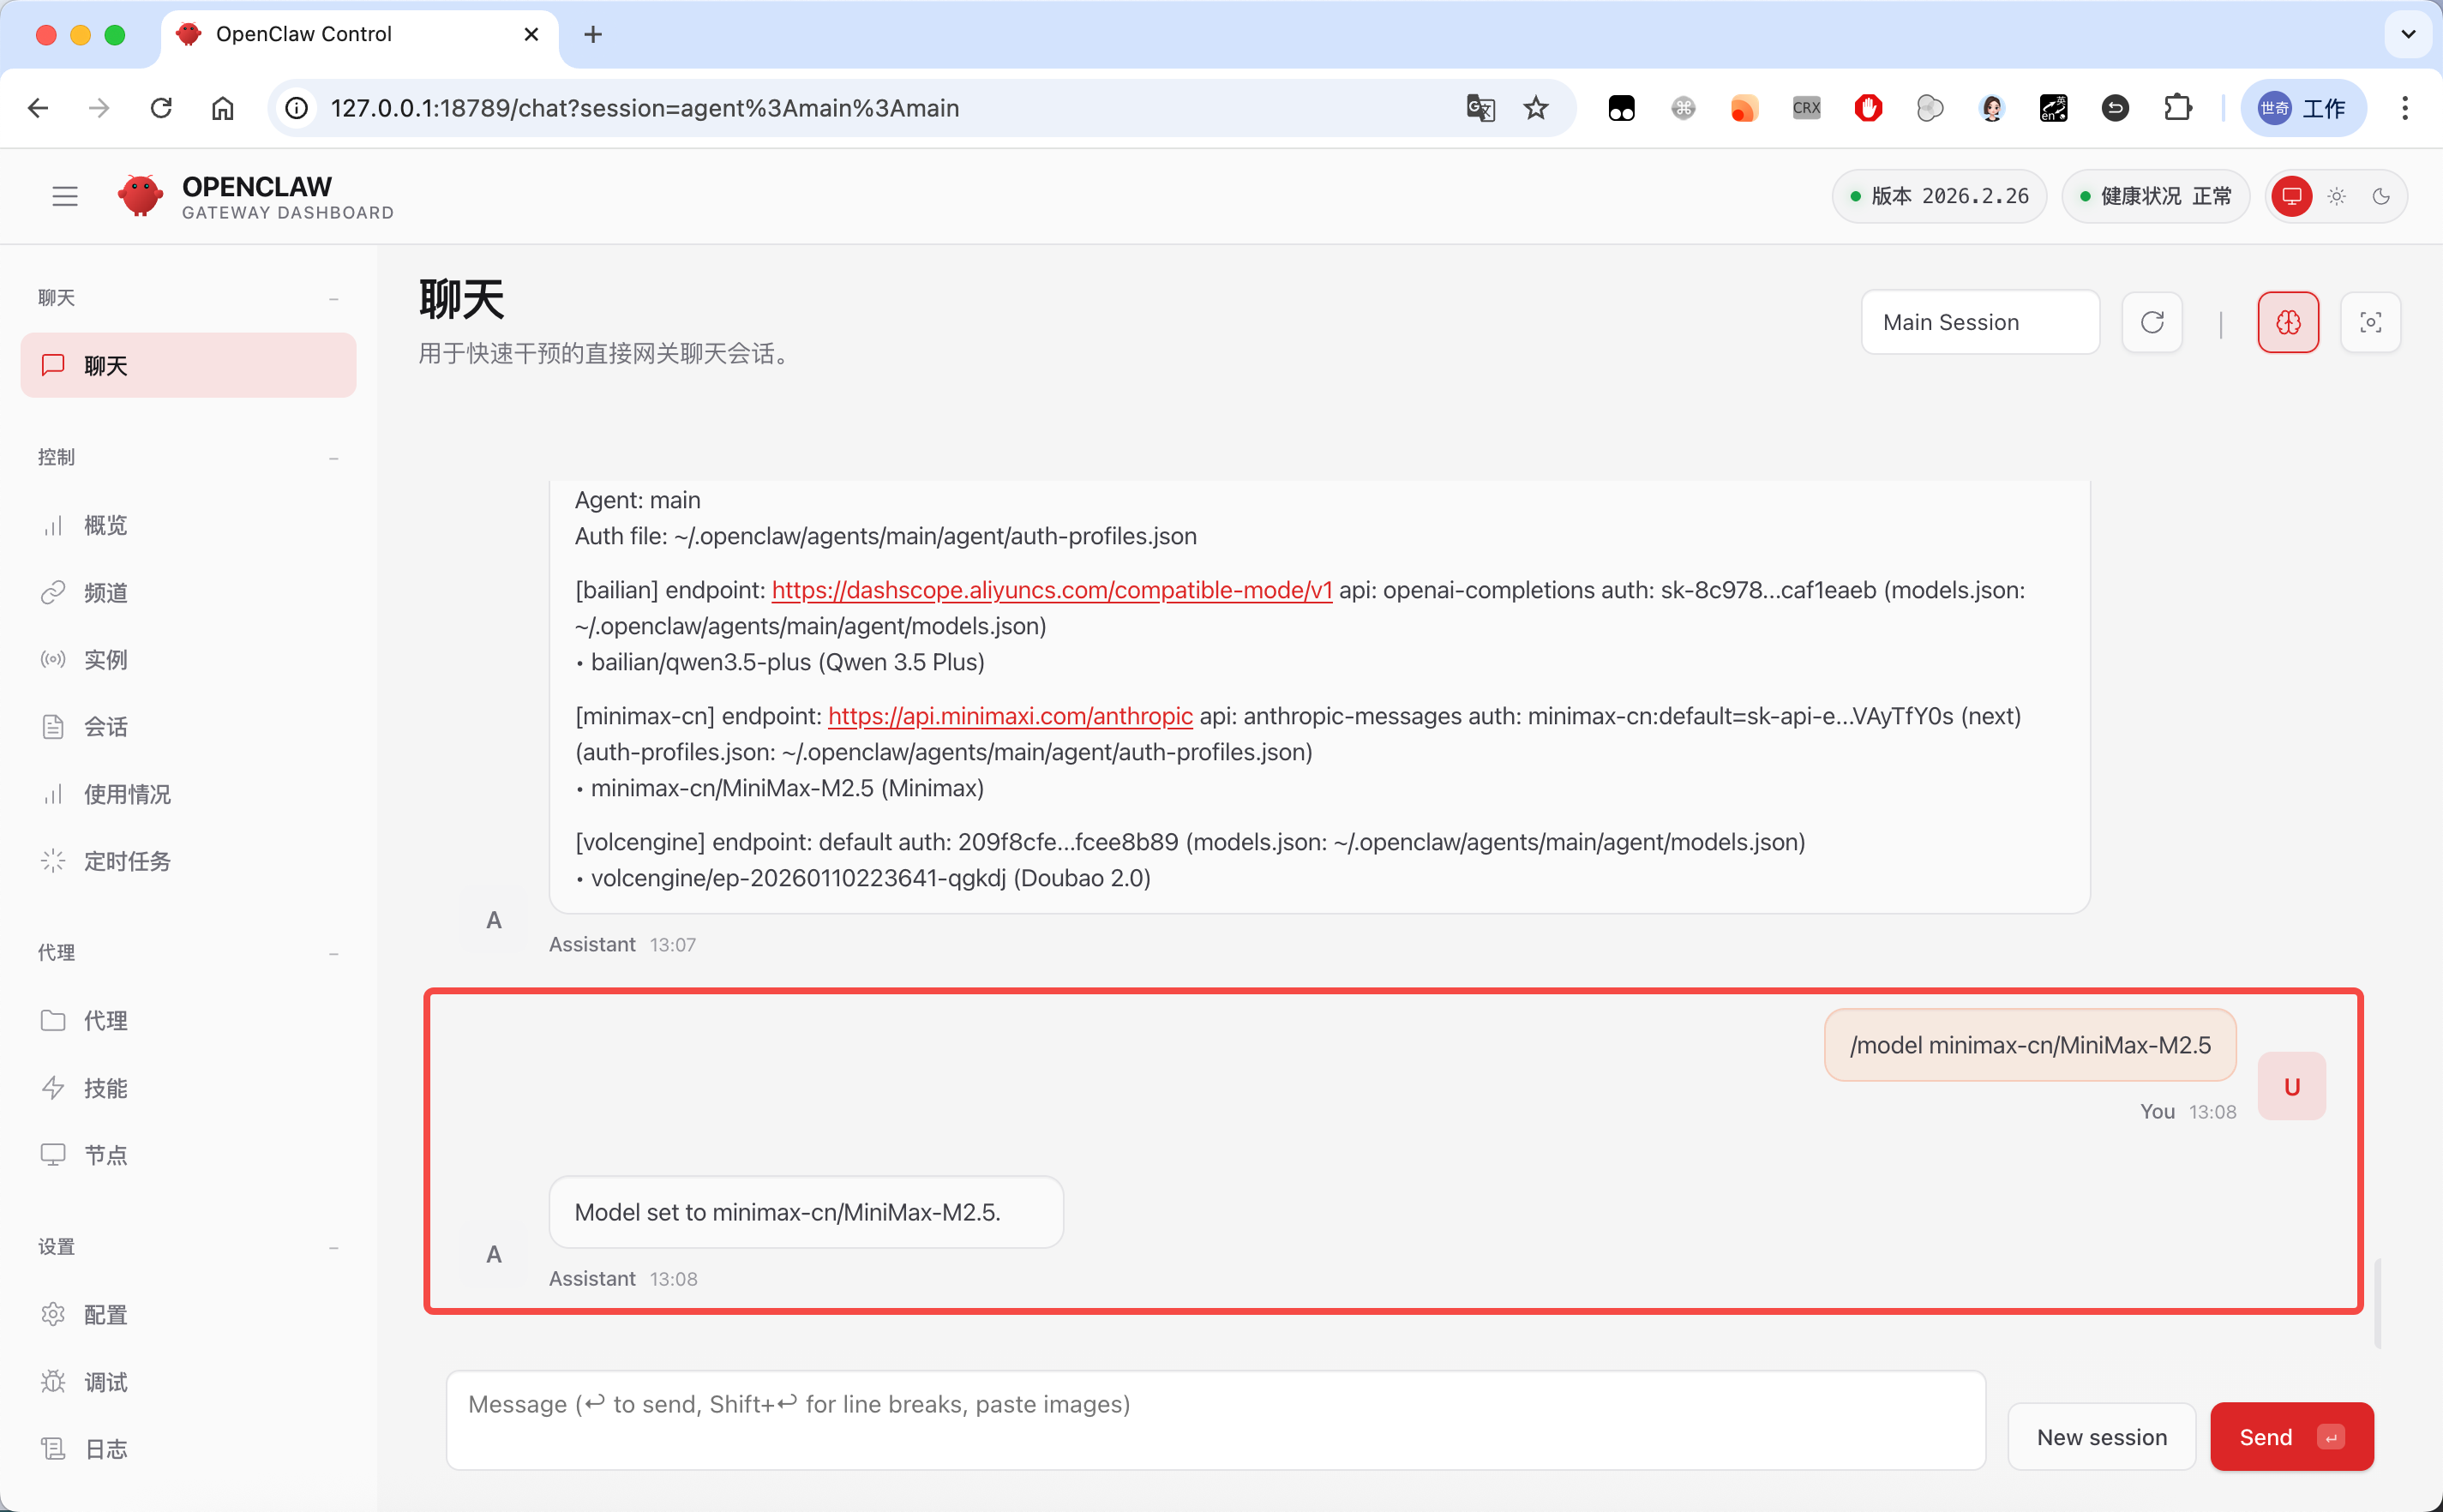
If you've configured multiple models, you can use /model <model-id> to switch between them quickly:
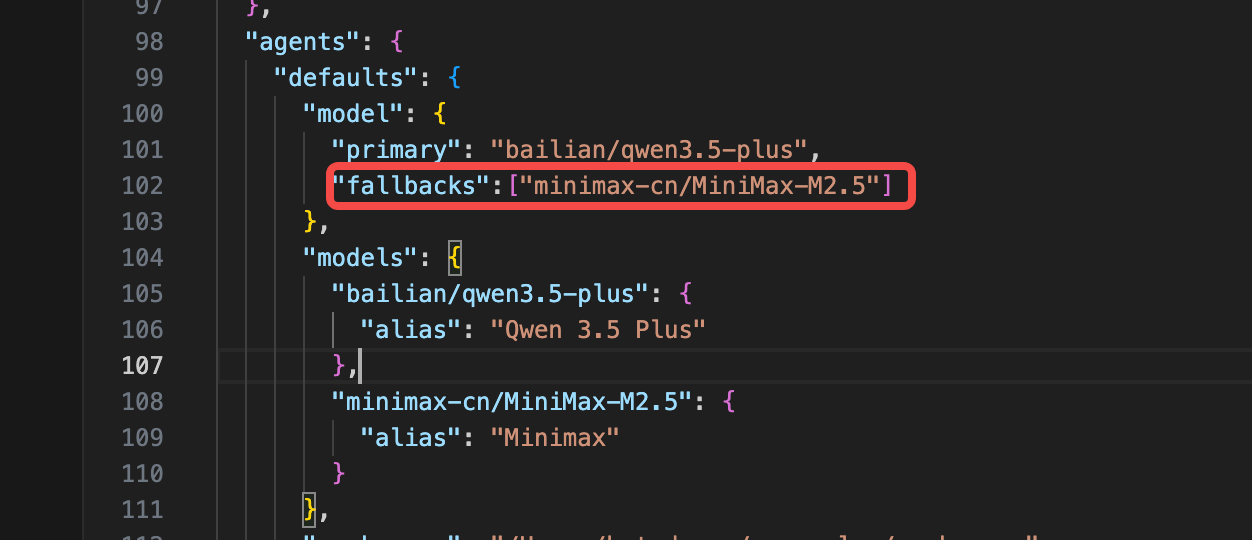
Model Fallback
OpenClaw burns through tokens fast in regular use. If your model's TPM (tokens per minute) is low, it's easy to hit the limit and have a task fail. And if you only configure a single model provider, you also risk failures from provider outages or running out of credit.
OpenClaw provides a fallback mechanism for exactly this. You can add a fallbacks field under defaults.model to configure backup models that will be used when the primary one fails.